Every task in the shop and its back office, step by step: products, themes, orders, payment, promotions, marketplace and settings. 52 guides — type in the search box to filter.
No guide matches. Try another word, like “order”, “email” or “points”.
Getting started
Install Shopora on your website
Where: Platform admin→Import project
Every product is a set of text files in the platform's block format. Each runs on its own; installed on the same website, they share customers and orders automatically.
Sign in with the platform's super admin account — background jobs run with the rights of the person who imports them.
Import the background.txt file first. It creates the tables and the background jobs; wait a few minutes for them to start.
Import the remaining files of the zip in the order of their names.
Open /dashboard and sign in again. The menu on the left only shows what your role may use.
Good to know: Installing all three? Import Shopora first, then the CRM, then Postora — the later ones read the data of the earlier ones.
Good to know: Daily jobs use the server clock. If the server runs on UTC, 03:20 on the server is 10:20 in Vietnam.
Try it with demo data
Where: Settings→Demo data and reset
Fill an empty shop with real-looking products (photos, colours and sizes), about 20 orders over two weeks, two vendor stores, a flash sale, discount codes, reviews, banners, pages, blog posts and messages.
Upload the demo folder (the sample photos) to the public folder of the website.
Open Settings → Demo data and reset and add the demo data. It takes about a minute.
When you are done testing, delete the demo data group by group before you start selling.
Good to know: Deleting cannot be undone — export what you want to keep first (Settings → Export data). You type DELETE to confirm.
northwind.shop
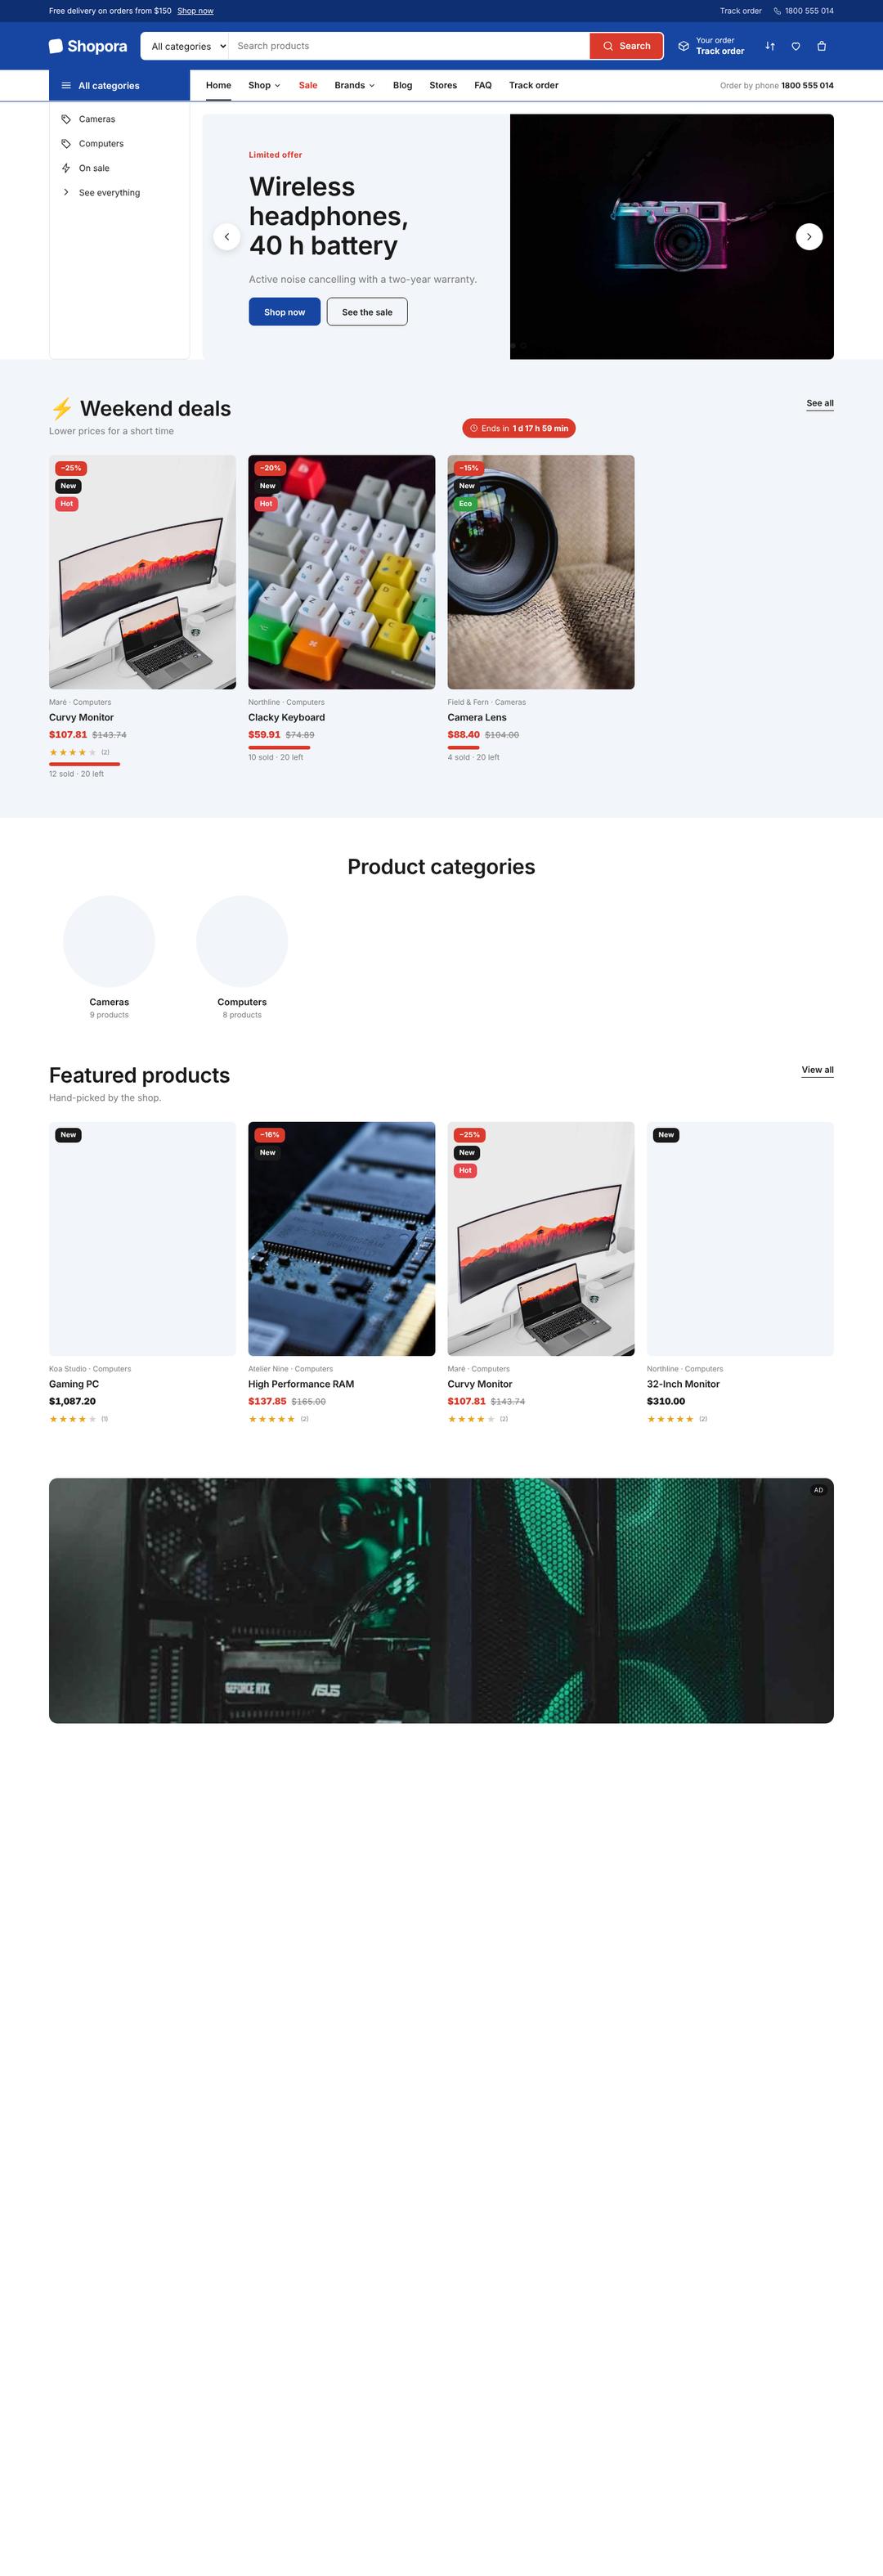
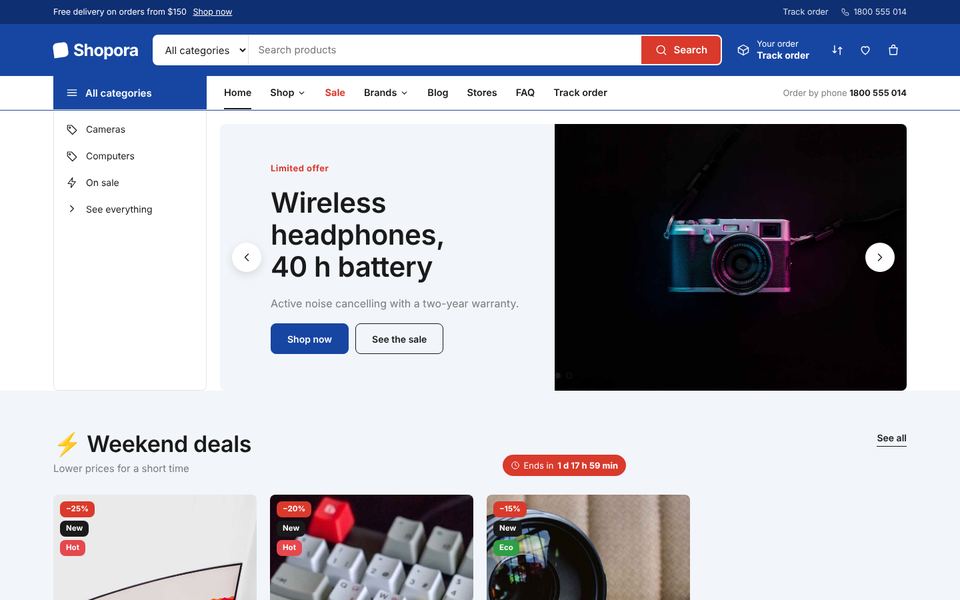
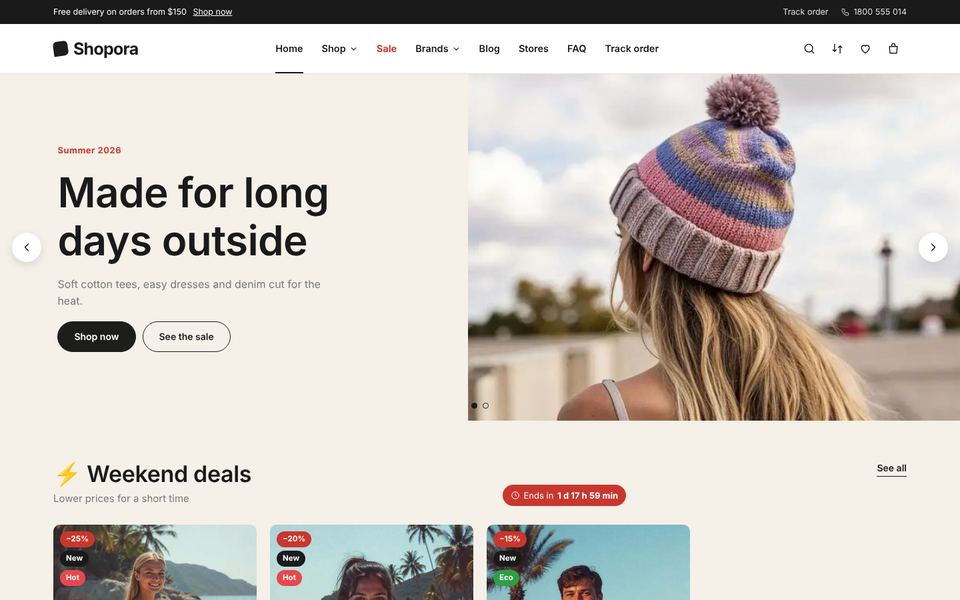
The demo shop: every block of the home page filled with sample products.
Copilot — run the shop in plain words
Where: Overview→Copilot
Type or say a sentence; Copilot reads your real products, orders and customers and answers with a list, a chart, a pre-filled form — or simply does it.
Open Copilot and type: “sales today”, “order SP-10455”, “add a product”, “orders to process”.
Click a row of the answer to open it.
For changes (prices, delivery fee, theme colours…) Copilot shows a preview first — nothing changes until you save, and Undo brings the old value back.
Good to know: Try: “delivery fee 30000”, “free delivery from 500000”, “dark header”, “square buttons”, “add colour Yellow to the cotton tee”.
Dashboard and sales report
Where: Overview→Dashboard · Sales report
Revenue, orders, orders waiting, low stock and best sellers by day, week or month.
Open Dashboard for today against yesterday.
Open Sales report and pick a period (day, week, month or from–to).
Click a bar or a row to see the orders behind the number.
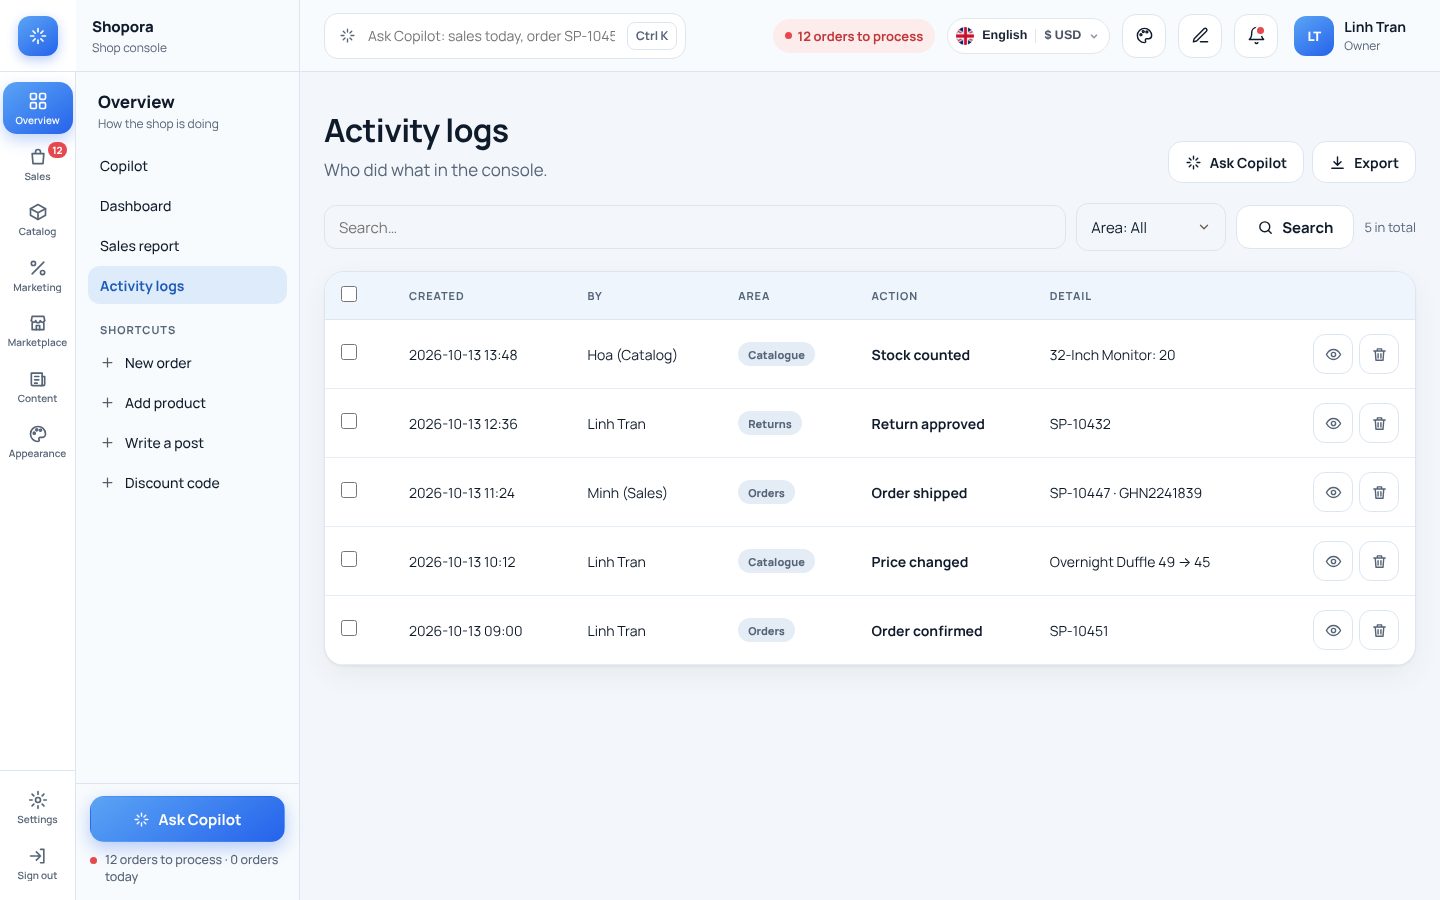
Good to know: Activity logs show who changed what, and when.
Background jobs on the server
Where: Order Mails→Background work on the server
Order emails, care scenarios, campaigns and app notifications are sent by the server every minute — even when nobody has an admin page open.
After the import the jobs switch themselves on (every 1–5 minutes, depending on the job).
Fill in the web address of the shop in the settings: the server needs it to build the links in emails.
Open the Background work on the server card: a green dot means running, red means not running yet, with the last error underneath.
Good to know: Messages that go to outside services (Zalo ZNS, SMS, social networks, Resend/SendGrid/Brevo email) are still sent by an open admin page, because the server cannot call other websites.
Good to know: While the server is running, open pages leave the work to it — nothing is ever sent twice.
Languages and currencies
One language or many, one currency or many
Where: Settings→Languages→Languages and currencies of the site
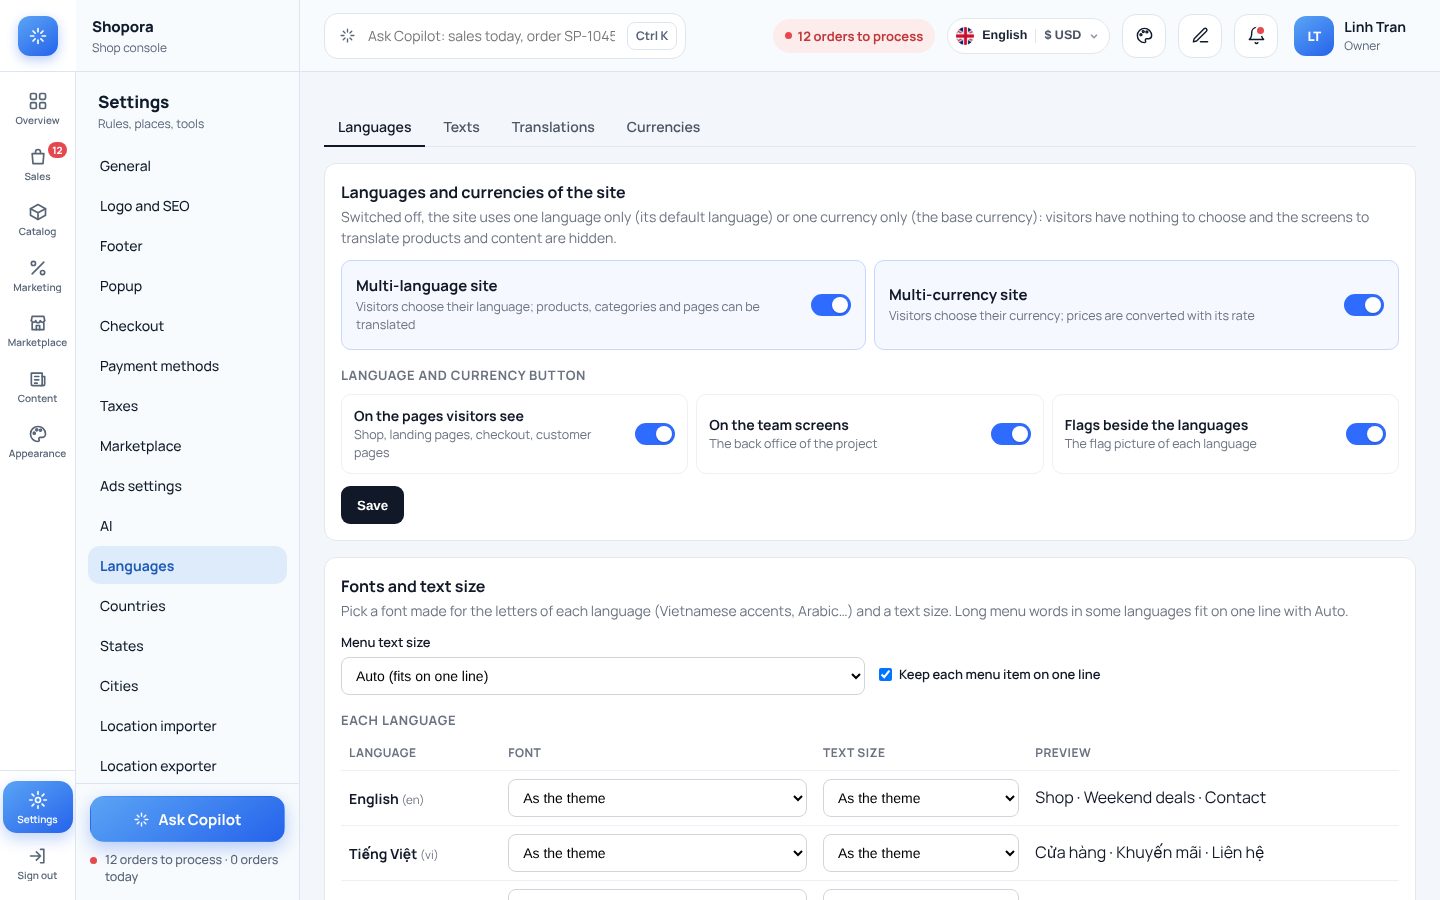
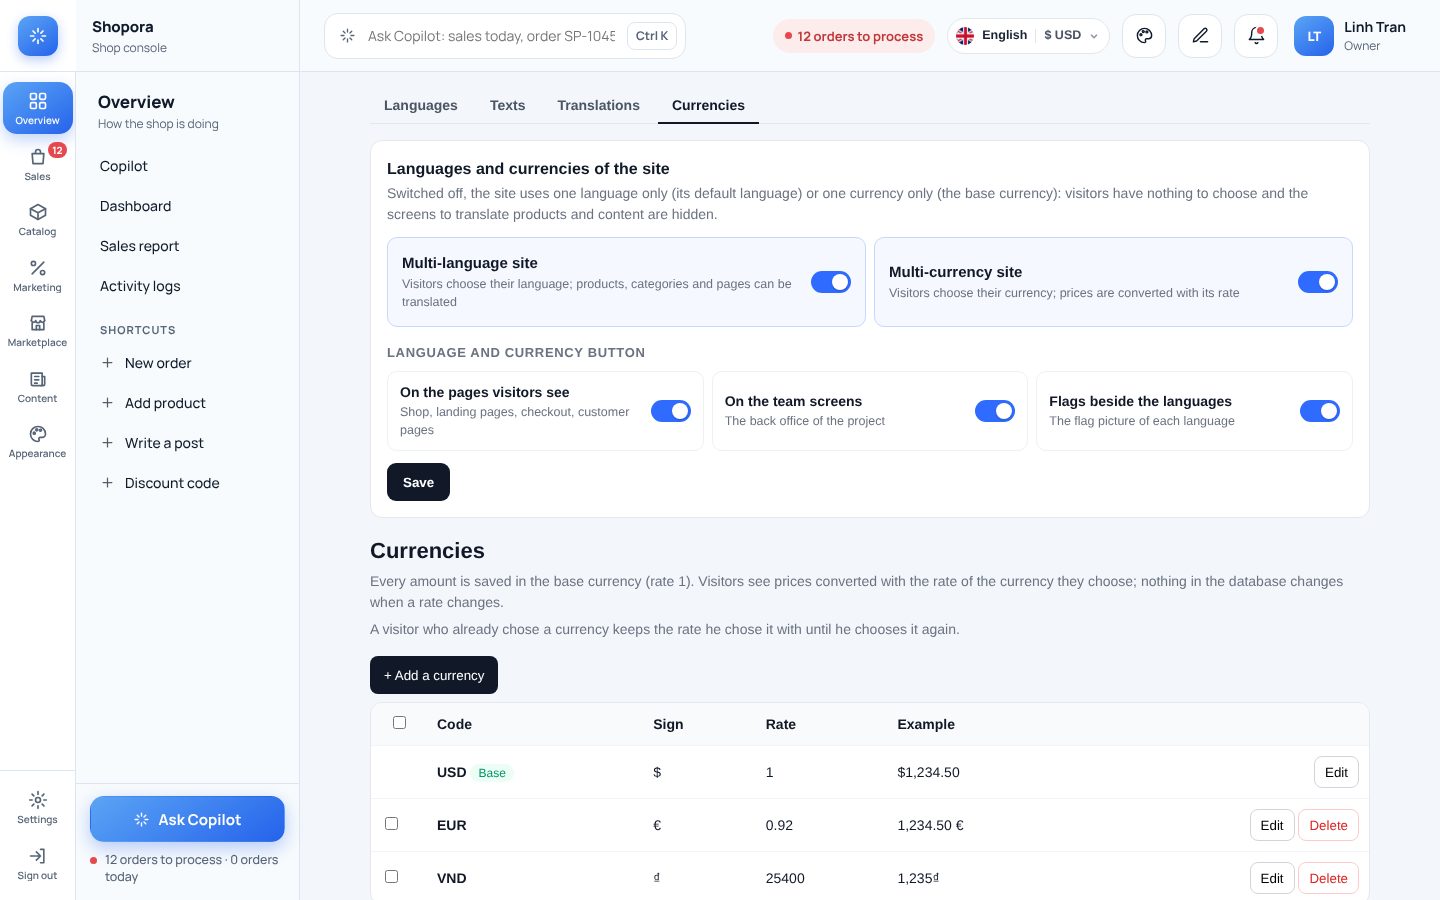
Two switches decide what visitors can choose. Switched off, the site speaks only its default language (or counts only in its base currency): there is no language or currency button, and the screens to translate content are hidden.
Open /shop-languages (the Languages tab at the top links the four screens: Languages, Texts, Translations, Currencies).
Multi-language site: on = visitors pick their language and your products, categories, brands, blog posts and pages can be translated; off = one language only.
Multi-currency site: on = visitors pick a currency and see prices converted; off = the base currency only.
Under Language and currency button choose where the button shows: on the pages visitors see, on the team screens, and whether each language shows its flag.
Click Save. The page reloads with the new setting.
Good to know: Nothing is deleted when you switch off: translations and currencies stay stored and come back when you switch on again.
Good to know: The button docks itself in the header of every theme; on a phone it shows short labels (EN · $).
northwind.shop/shop-languages
The switches at the top of the Languages screen.
Add a language and choose the default one
Where: Languages→Add a language · Default language
Five languages come ready with every text of the product: English, Vietnamese, French, German and Arabic. The default language is the one new visitors see — and the one you type your products in.
Sign in as the platform's super admin — the list of languages belongs to the platform.
Under Add a language click Tiếng Việt, Français, Deutsch or العربية: the language is created with all its texts and its flag.
A language the site already has: click Add the texts of this project on its row. Texts still in English are replaced; texts you edited yourself are kept.
Under Default language pick the language visitors see first and save. The originals of your products, categories, brands, blog posts and pages are written in this language (Vietnamese, English, Arabic… whichever you choose).
Good to know: Arabic switches the pages to right-to-left by itself.
Good to know: If the screen says the server kept fewer texts than were sent, ask your host to raise max_input_vars to 10000 and click again.
Good to know: Visitors who already chose a language keep their choice for a year.
Edit the texts of a language (with Copilot)
Where: Languages→Texts
Every word of the screens and of the shop, in each language: correct a translation, finish the ones still in English, or add a language that is not in the ready list.
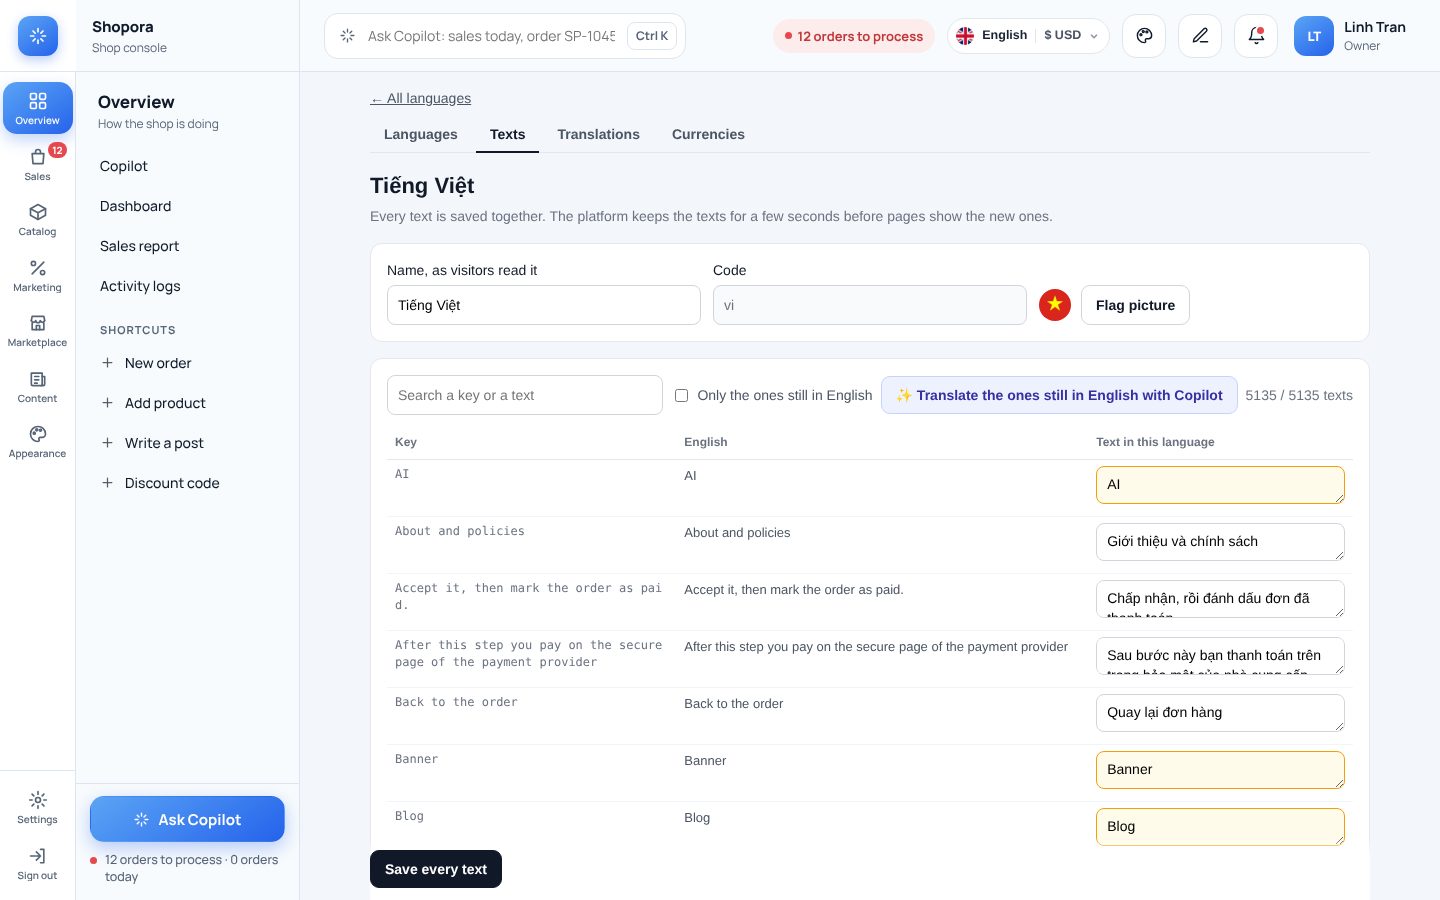
Open /shop-language-texts and click Edit on a language (or Add a language: name, code such as es or pt-br, and a flag picture).
Tick Only the ones still in English to see what is left. The list shows 20 texts a page; the search box finds a word in the key, the English text or the translation.
Type the translation beside the English text — or click ✨ Translate the ones still in English with Copilot: it fills 40 texts at a time with the site's AI. Read them over.
Click Save every text. Pages show the new words within a few seconds.
Good to know: A text the site uses but this language does not have yet is listed too (still in English), so nothing is missed.
Good to know: Words inside %s, :name or {x} are filled in by the system — keep them as they are.
northwind.shop/shop-language-texts
The texts of one language, with the English text as a guide.
Translate products right in the lists
Where: Products · Categories · Brands · Posts · Pages→Flags on each row
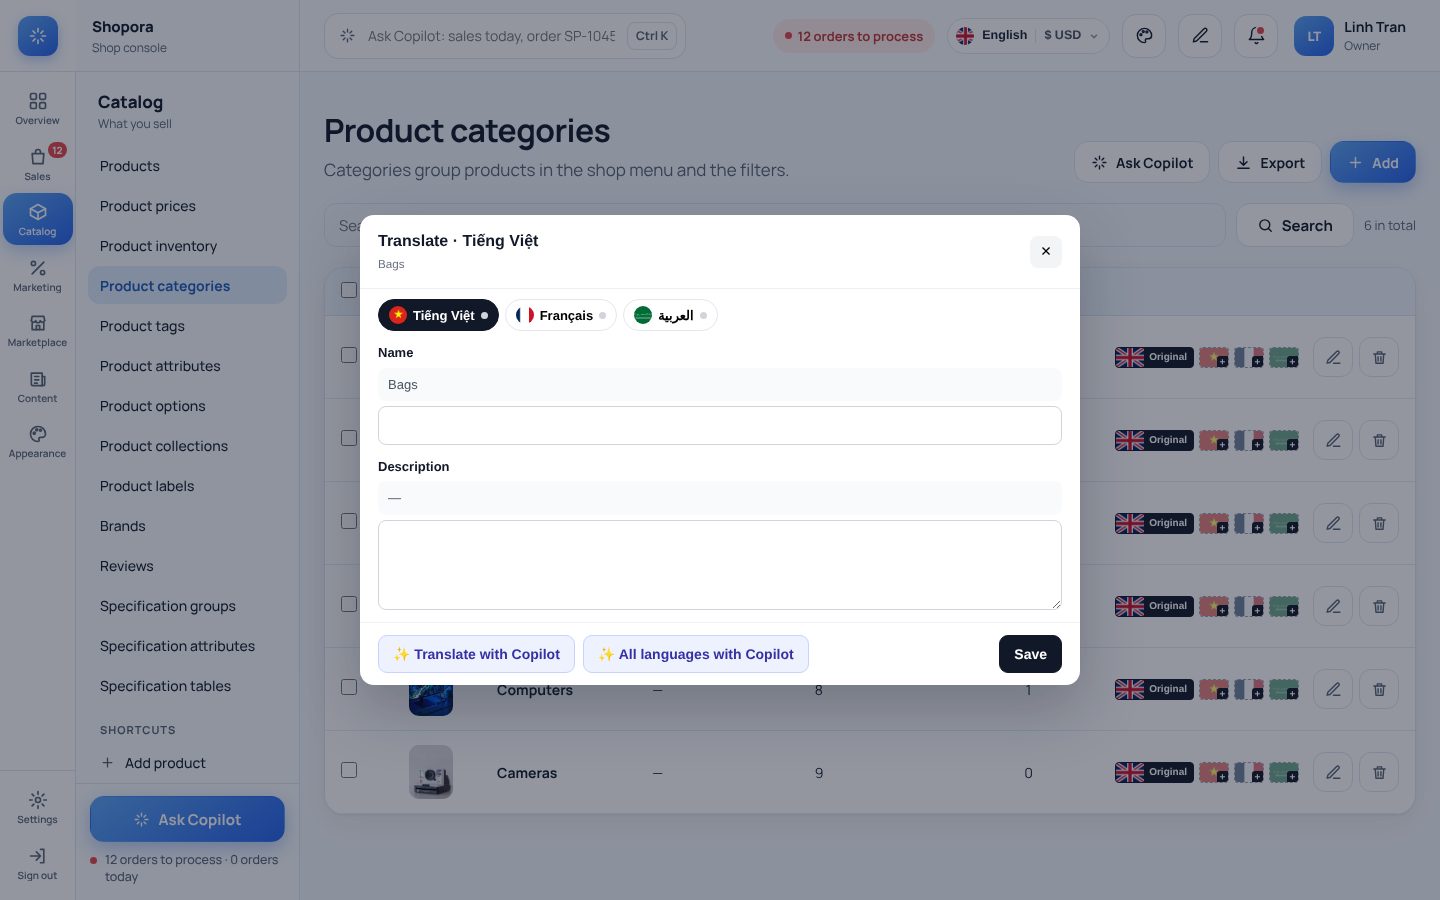
Every row of a translatable list carries small flags. The dark Original badge is the language you typed the row in; a flag with a green ✓ is translated, a dashed flag with + is not yet.
Open Products (or Product categories, Brands, Posts, Pages).
Click a flag on a row: a window opens with the original text above each box.
Type the name, summary, description and SEO texts in that language — or click ✨ Translate with Copilot to fill them, then Save.
✨ All languages with Copilot translates and saves the row in every language in one go.
Switch language with the tabs at the top of the window; the green dot shows which ones are done.
Good to know: Only the texts are translated. Price, stock, photos, options and links stay those of the original — change them once, every language follows.
Good to know: English is offered as a translation when your shop is written in another language.
Good to know: Delete an original and its translations are tidied away by the server within a few minutes.
northwind.shop/manage/categories
Translate a category without leaving the list.
The Translations screen
Where: Languages→Translations
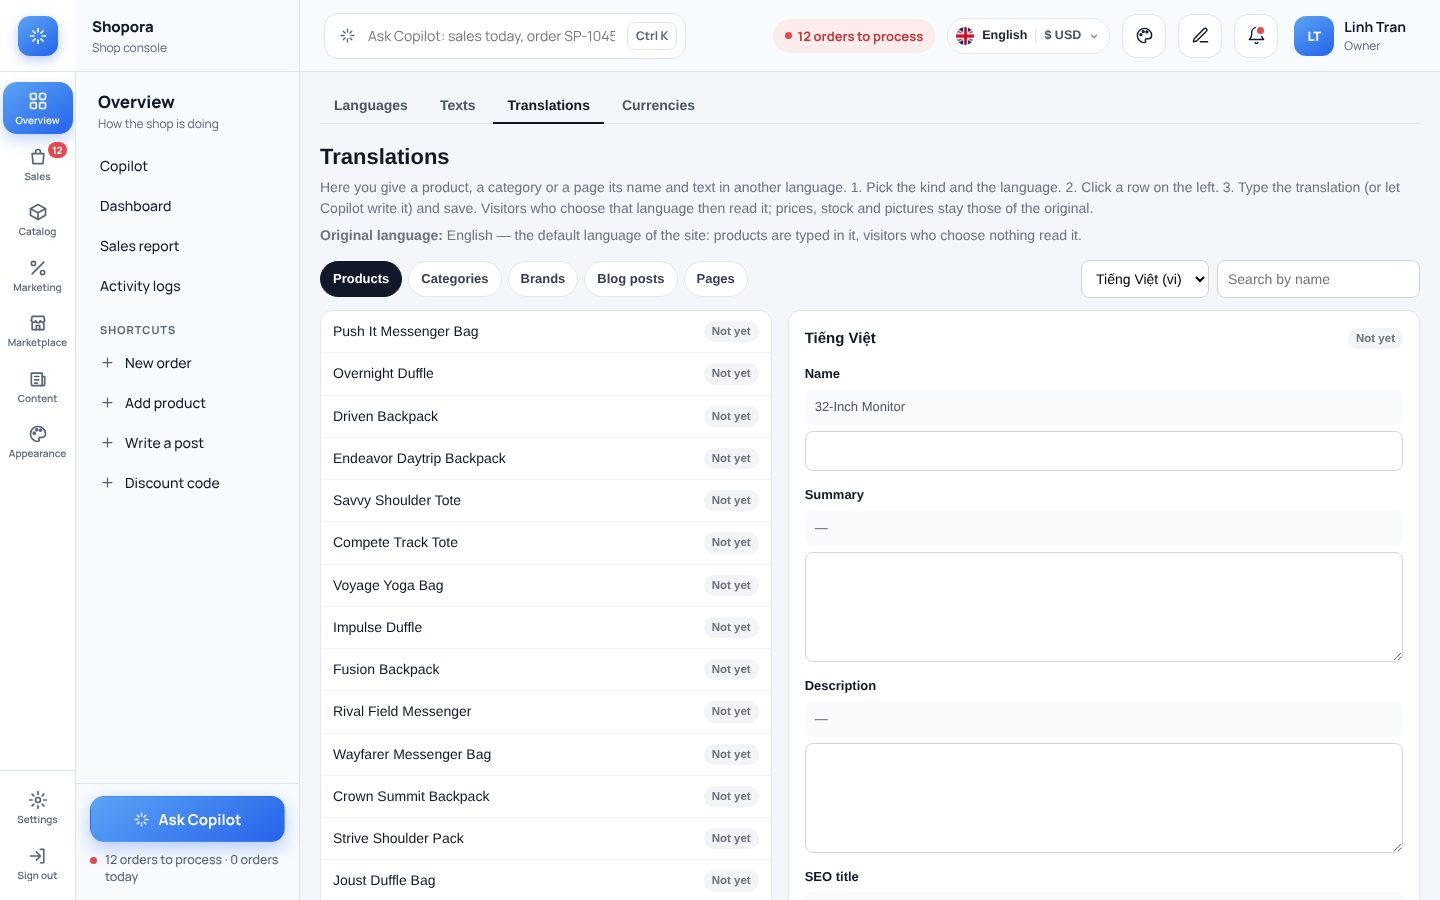
The same translations, all in one place: pick the kind of row and the language, see at a glance what is translated, and fill the rest.
Open /shop-translations.
Pick the kind (Products, Categories, Brands, Blog posts, Pages) and the language at the top.
Rows marked Not yet have no translation in that language. Click a row: the original text shows beside each box.
Type the translation or click ✨ Translate with Copilot, then Save the translation.
Good to know: The list shows 20 originals a page, newest first; search by name to find one.
Good to know: Visitors who chose that language read the translation; when a field is left empty they read the original.
northwind.shop/shop-translations
Originals on the left, the translation form on the right.
Page addresses in each language
Where: Languages→Page addresses per language
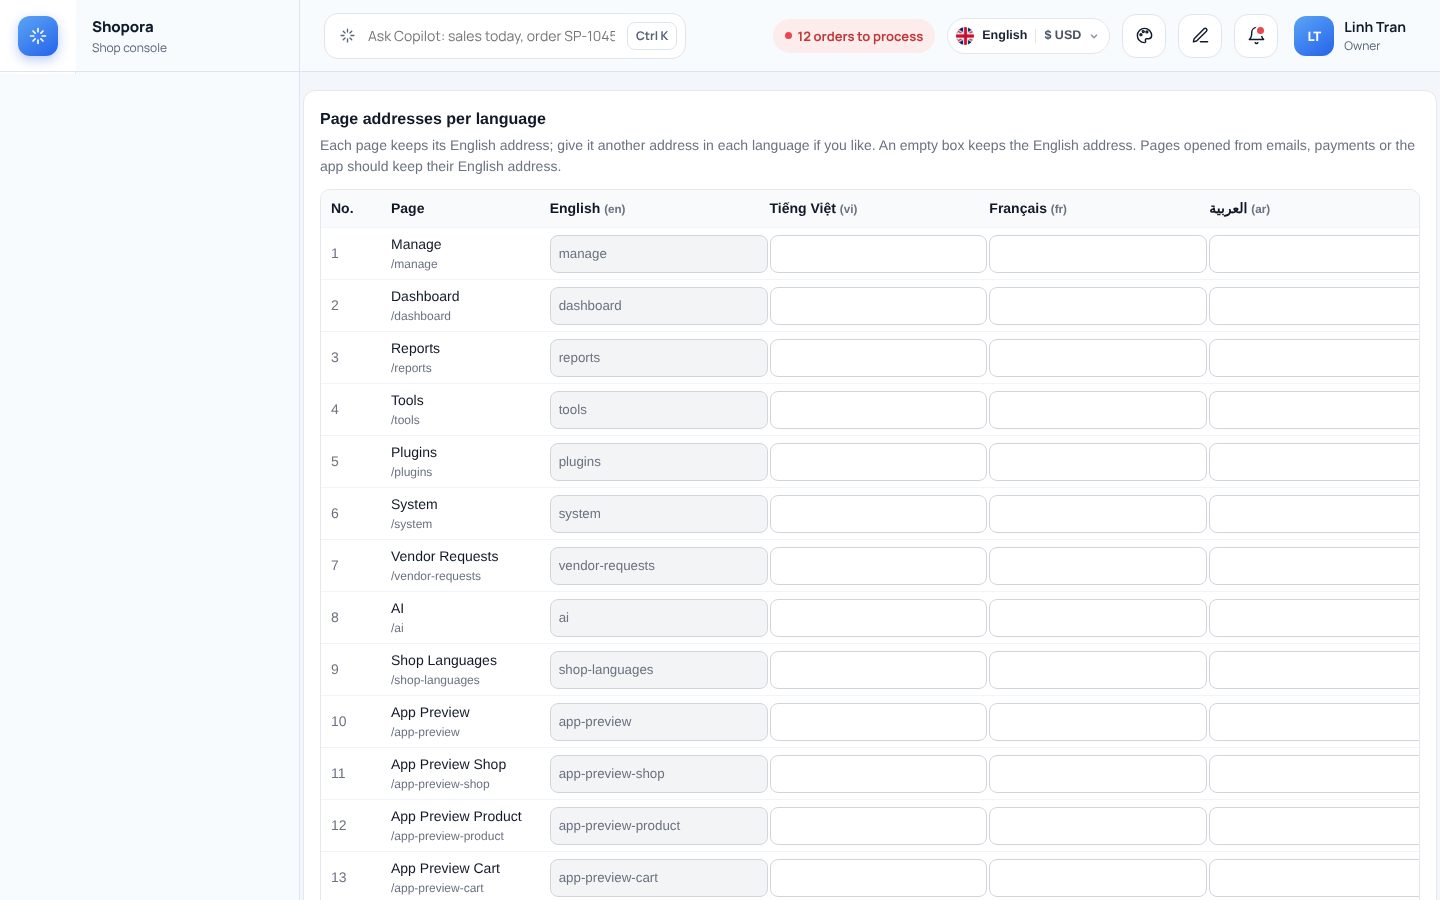
Every page has an English address (/checkout, /blog…). Give it another address per language and links switch by themselves when a visitor changes language — good for search engines.
Scroll to Page addresses per language at the bottom of the Languages screen.
Type the address of a page in each language (for example thanh-toan for Vietnamese). An empty box keeps the English address.
Click Save the addresses. Links use the new addresses within a few seconds.
Good to know: Two pages cannot share one address in the same language.
Good to know: Pages opened from emails, payments or the app (payment return, order tracking links) are best left on their English address.
northwind.shop/shop-languages
One box per page and language.
Sell in several currencies
Where: Languages→Currencies
Visitors see prices in the currency they choose (USD, EUR…). Orders and reports always count in your base currency.
Open /shop-currencies (super admin). The row marked Base has rate 1 — do not delete it or change its rate.
Click + Add a currency: code (USD), sign ($) and rate = units of this currency for 1 unit of the base (base VND → USD ≈ 0.0000385).
Choose the side of the sign and whether there is a space, check the Example column, then save.
Good to know: Changing a rate never changes an amount that is stored.
Good to know: A visitor keeps the rate they chose with until they choose again.
Good to know: Switch Multi-currency site off to sell in the base currency only.
northwind.shop/shop-currencies
Currencies with their rate and an example price.
Fonts and text size for each language
Where: Languages→Fonts and text size
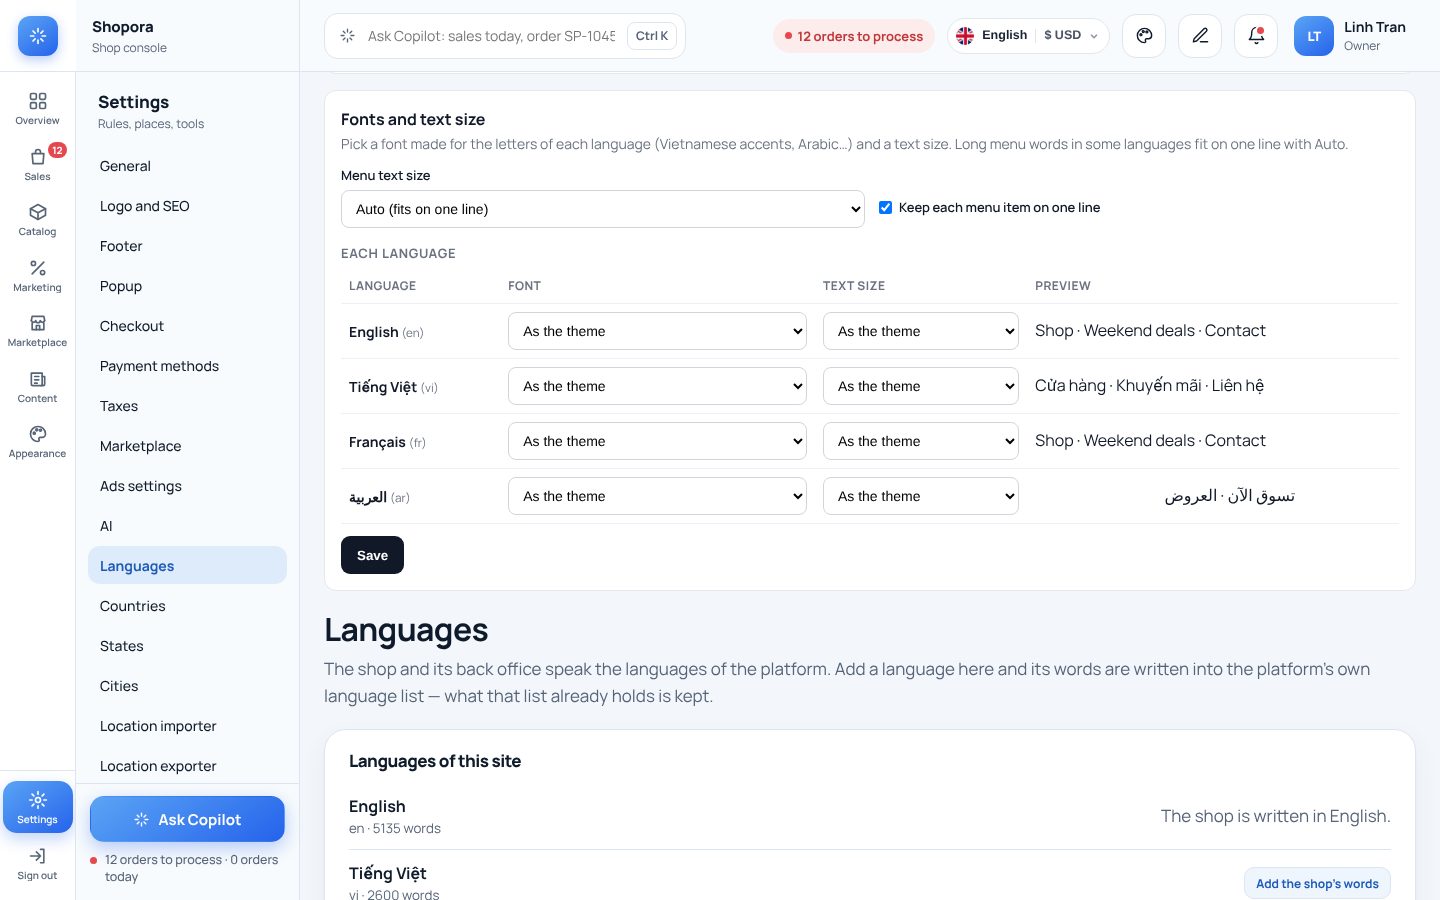
Each language can have a font made for its letters — Vietnamese accents, Arabic script — and its own text size. The header menu always fits on one line.
Scroll to Fonts and text size on the Languages screen.
Menu text size: Auto keeps the theme's size and shrinks it slightly only when the menu would not fit; or pick 12–18 px.
Leave Keep each menu item on one line ticked: when there is not enough room the spacing tightens, then the last items move into a More ▾ menu.
For each language pick a font (Be Vietnam Pro, Inter, Roboto, Noto Sans, Montserrat, Lexend… or for Arabic Cairo, Tajawal, Noto Sans Arabic, IBM Plex Sans Arabic, Almarai, Readex Pro) and a text size. The Preview column shows it at once.
Click Save; visitors see it on their next page.
Good to know:As the theme keeps the fonts of the theme you chose.
Good to know: Serif fonts (Lora, Merriweather, Playfair Display) suit fashion, books and magazines.
northwind.shop/shop-languages
A font and a size per language, with a live preview.
Products
Add a product
Where: Catalog→Products→Add product
Put an item on sale, with its own price and stock for every colour and size.
Go to Catalog → Products and click Add product (or tell Copilot “add a product”).
Fill in Name and Price — the only two required fields. Category, brand, photos and SKU can come later.
Choose the type: Physical (stock, weight, parcel size) or Digital (no delivery; the download link appears once the order is paid).
Add photos: the main one first. Write with AI drafts the description; AI can also create images once AI is set up.
Under Colours and sizes each row is one colour/size with its own price, stock and photo. No variants? Keep one row called “One size”.
Click Save — the product is live at once.
Good to know: The price before discount must be higher than the price, or the shop refuses it.
Good to know: Variant SKUs are built from the main SKU, e.g. TEE-001-BLK-M.
Good to know: Digital products cannot be paid cash on delivery.
northwind.shop
What the customer sees after you save: price, price before discount, sizes, stock and extra options.
Colours, sizes and options with their own price
Where: Catalog→Products→open a product→Colours and sizes
Sell one design in many colours and sizes, each combination with its own price, stock, SKU and photo.
Open the product, section Options and prices: name the first option (e.g. Colour) and add its values.
Add a second option if needed (e.g. Size). Every combination gets its own price row.
New rows start at the base price plus the extra price of each value; edit the rows that differ.
Adding a colour to a product that already has sizes: tick the sizes that colour comes in — one save creates them all.
Each colour can have its own photo, or tick “Use the main product photo”.
Good to know: Every row needs a colour or size, a price and a whole-number stock, and no two rows may be the same.
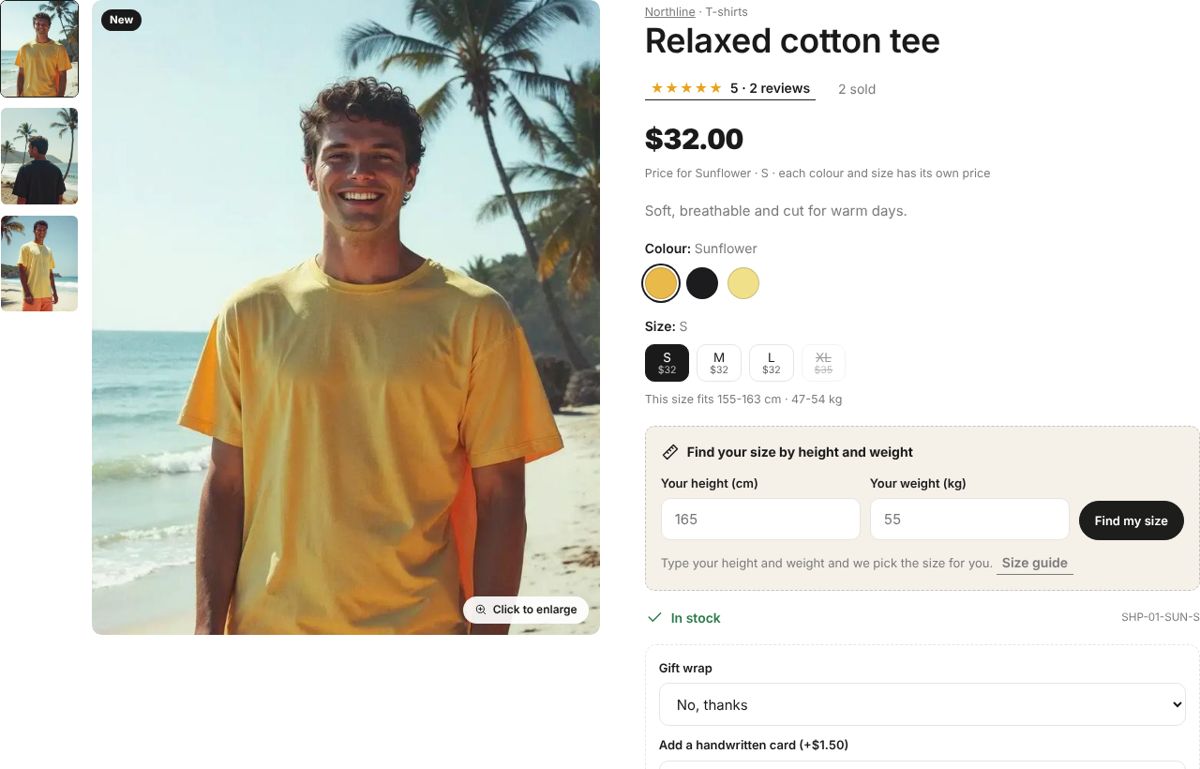
Good to know: Or tell Copilot: “add colour Yellow to Relaxed cotton tee” — it asks for the price and the photo.
northwind.shop
Each colour and size has its own price, with a size finder by height and weight.
Import many products at once
Where: Settings→Import products
Bring a whole product list in from Excel or CSV.
Prepare a CSV whose first line holds the column names: name, price, stock, category, brand, sku, colour, size, image.
Rows with the same name become the colours and sizes of one product.
Open Import products, paste the rows or pick the .csv file, check the preview, then import.
Good to know: The image column is a full image address (https://…).
Edit prices and stock in bulk
Where: Catalog→Price list · Stock
Change the price and stock of many products on one screen.
Price list: one row per product — price, stock and status, edited in place.
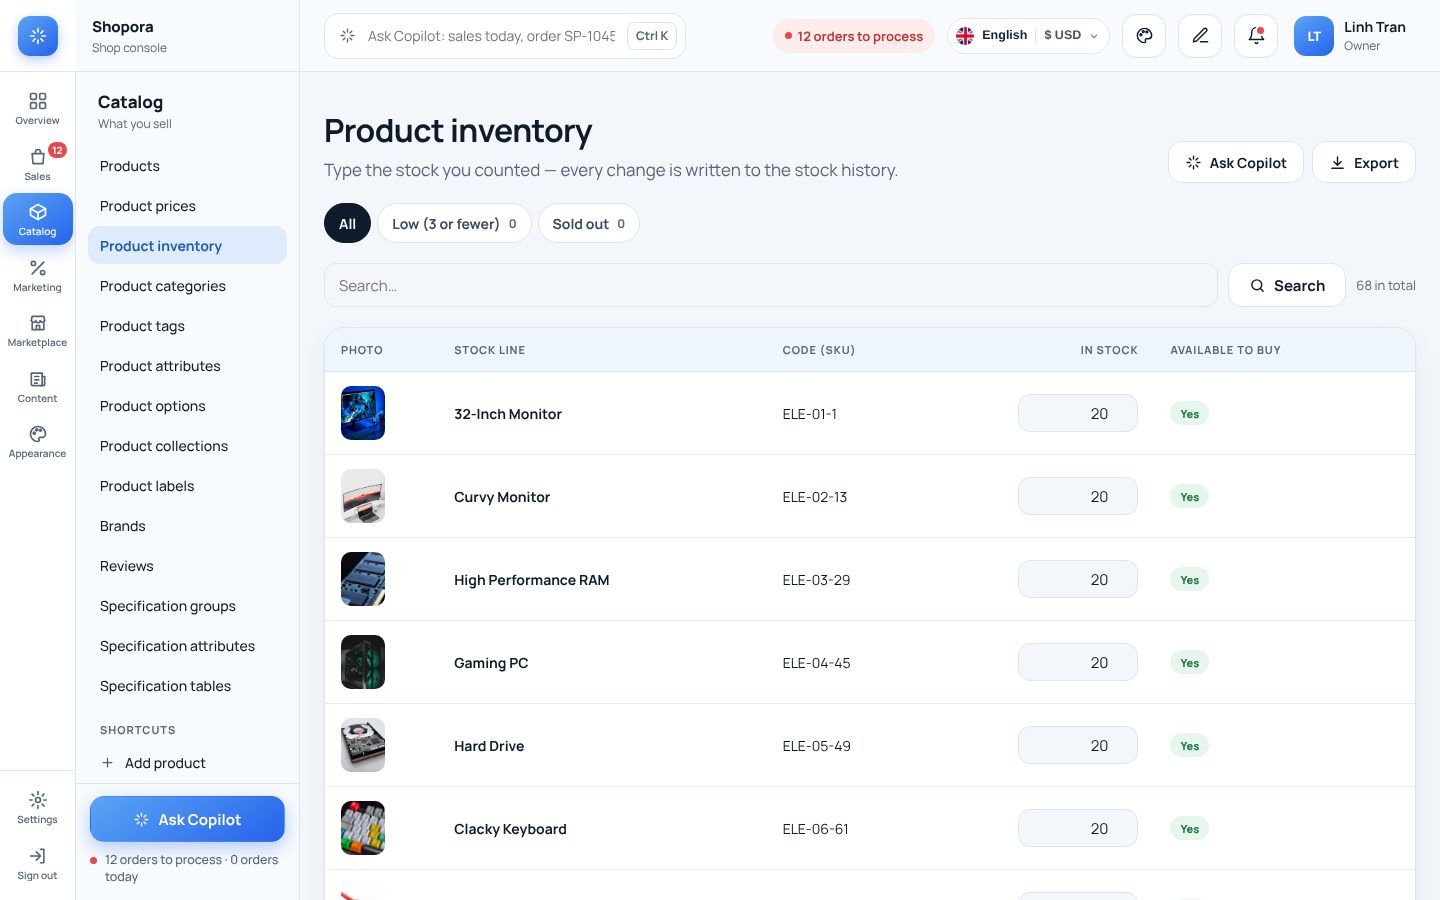
Stock: one row per colour/size, with a filter for items at 3 or fewer.
Every stock change is recorded (opening stock, sale, cancellation, return, manual edit).
What each customer bought, carts left behind and orders not finished.
Customers appear after their first order, with order count and total spent.
Customer carts and Unfinished orders: who left what, and for how much.
With the CRM installed, abandoned carts are reminded automatically (see the CRM guide).
northwind.shop
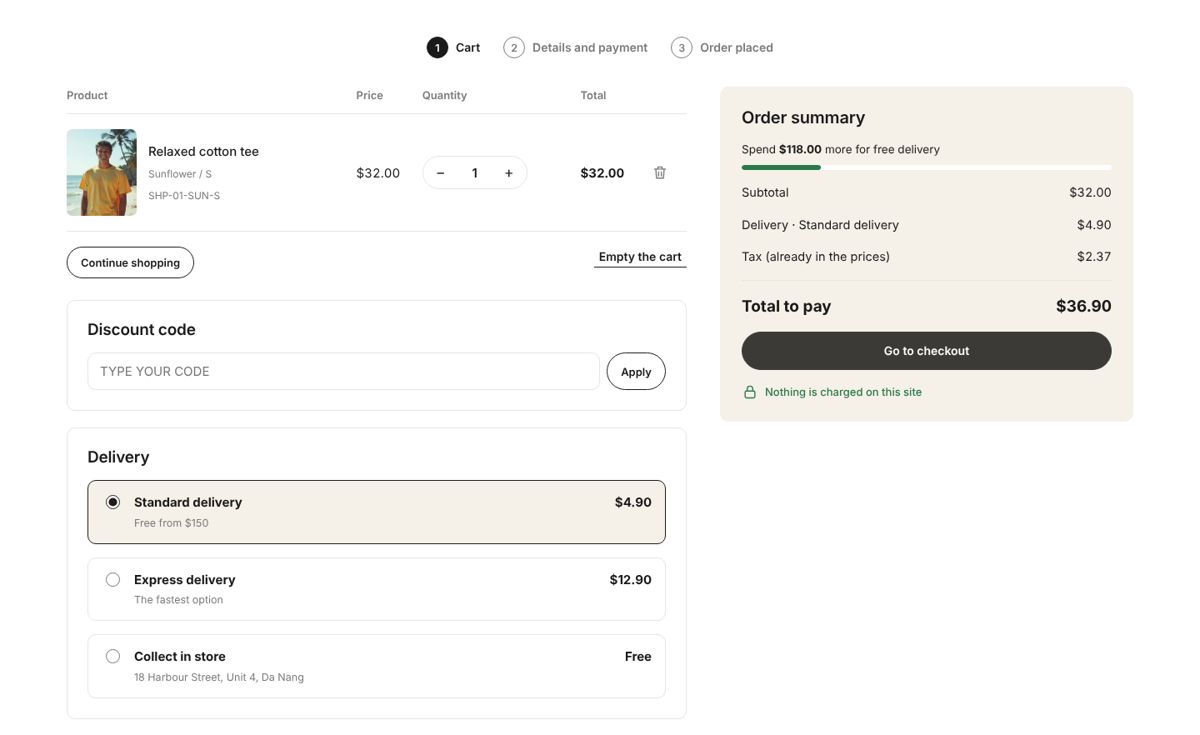
The cart: discount code, delivery choice and the free-delivery bar.
Customers track their order
Where: Shop→/track
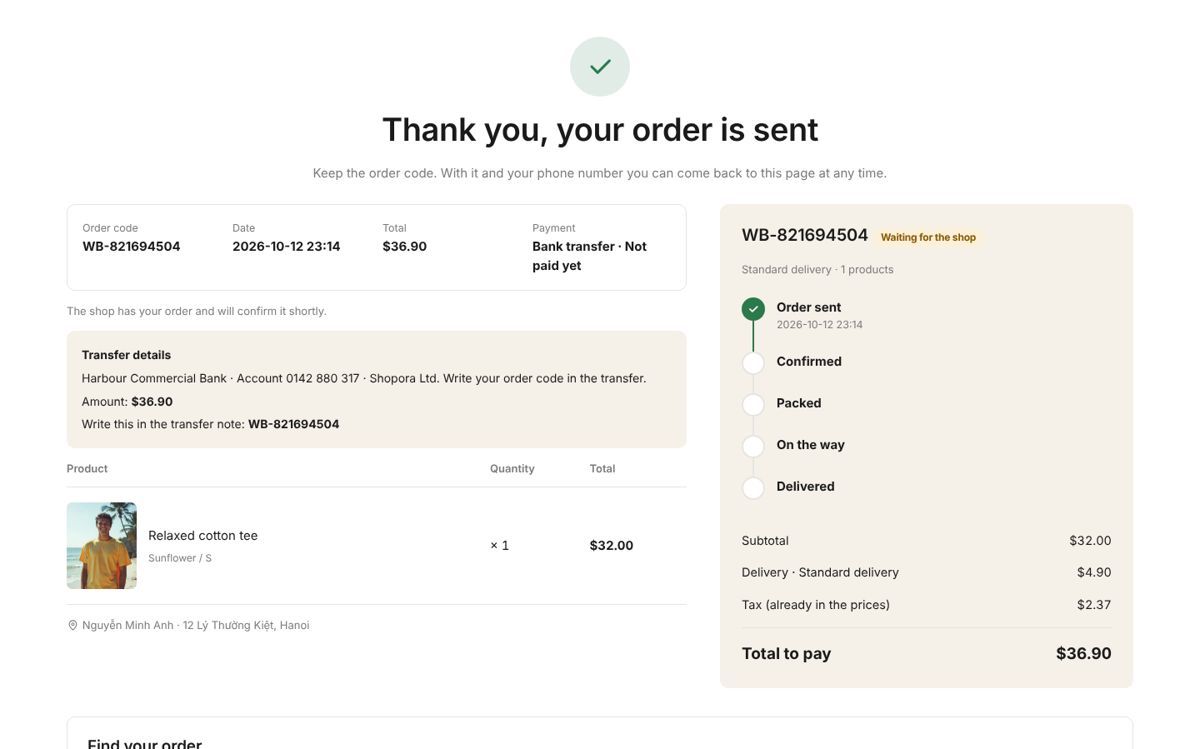
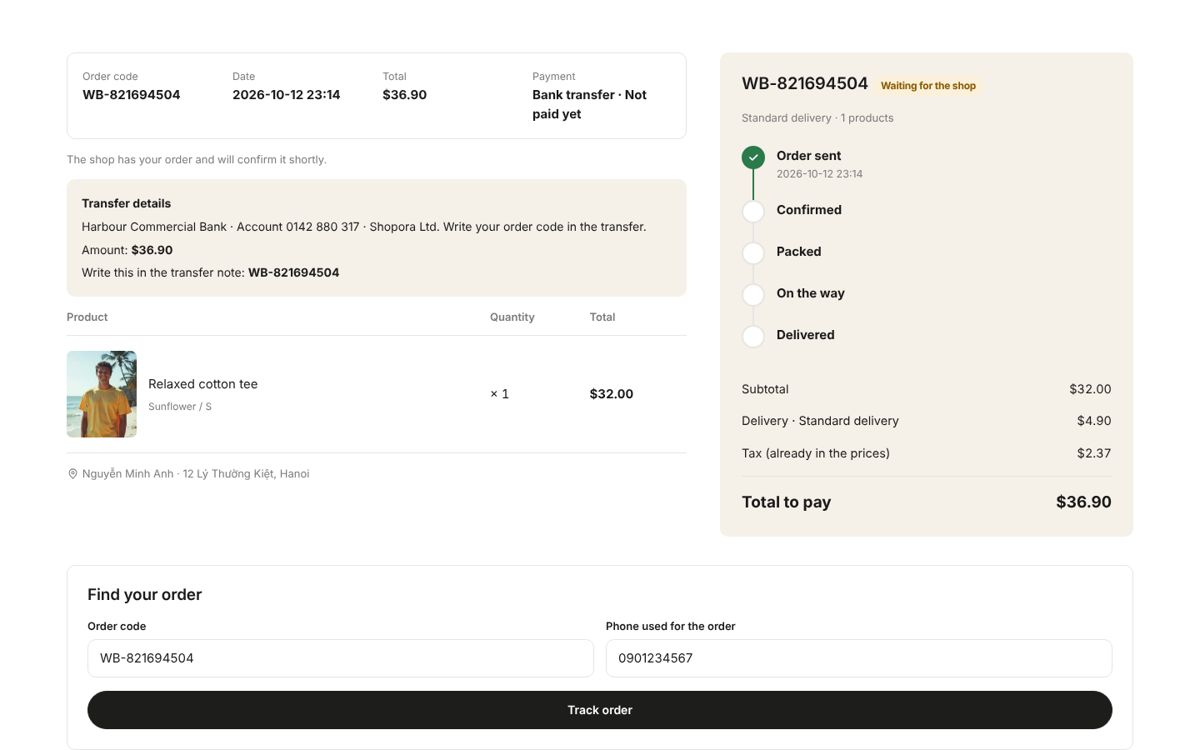
Customers look up an order with its code and phone number — no account needed.
The customer opens Track order and types the order code (WB-…) and the phone number used.
The page shows every step of the order, and download links for digital items.
northwind.shop
Order tracking: sent → confirmed → packed → on the way → delivered.
Automatic order emails
Where: Order Mails
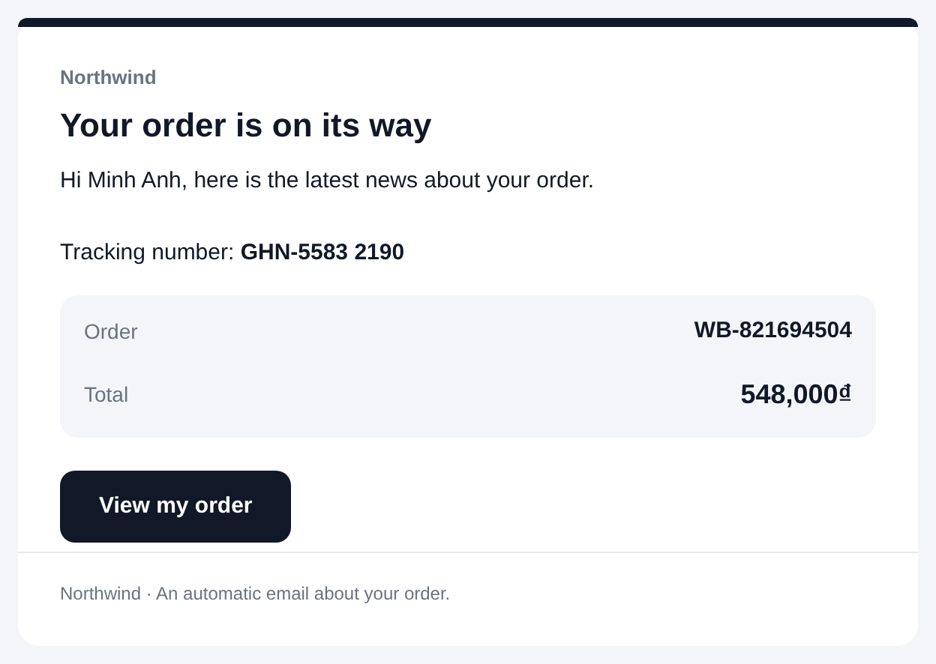
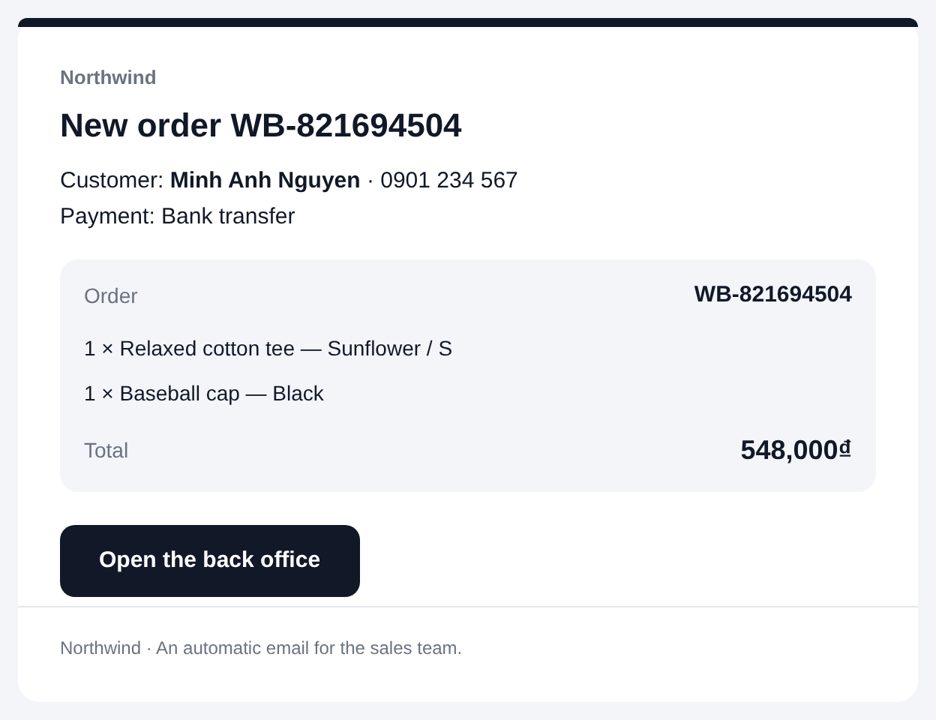
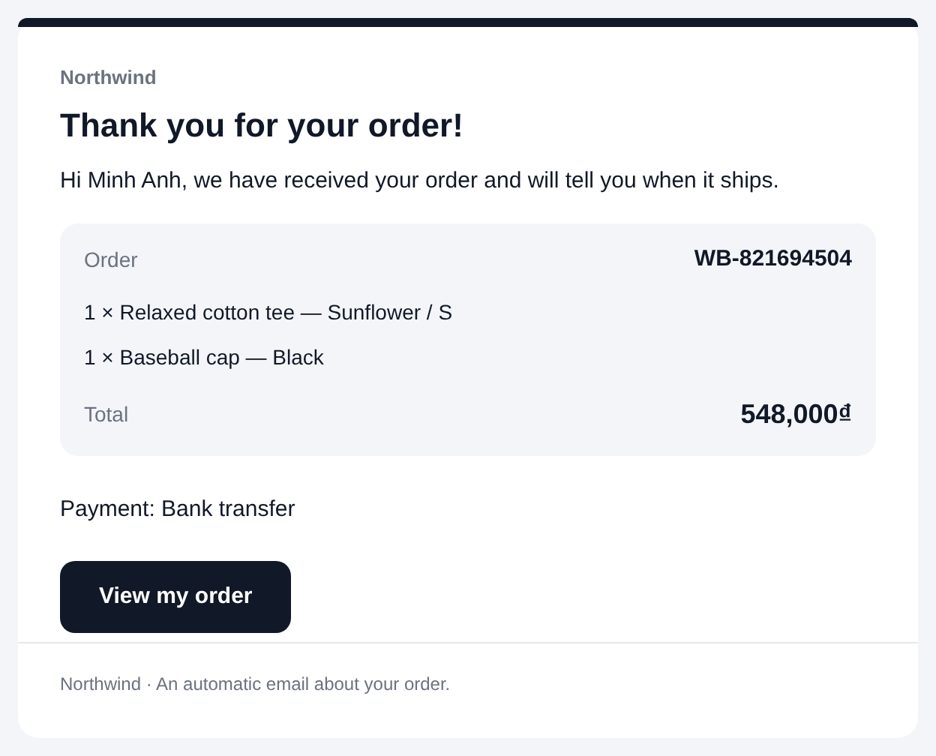
The server emails the buyer when an order is placed, confirmed, shipped, delivered, cancelled or paid, and tells your team about new orders.
Open /order-mails and tick Send order emails.
Fill in the shop name, web address, team email, email language and currency code; save.
Emails leave within about 3 minutes. The list shows waiting, sent and failed emails with the reason.
Failed ones: tick them and click Send selected again.
Good to know: Switching it on does not email old orders.
Inbox — Mail
“Thank you for your order” — sent by the server a few minutes after the order.
Payment and delivery
Payment methods
Where: Settings→Payment methods
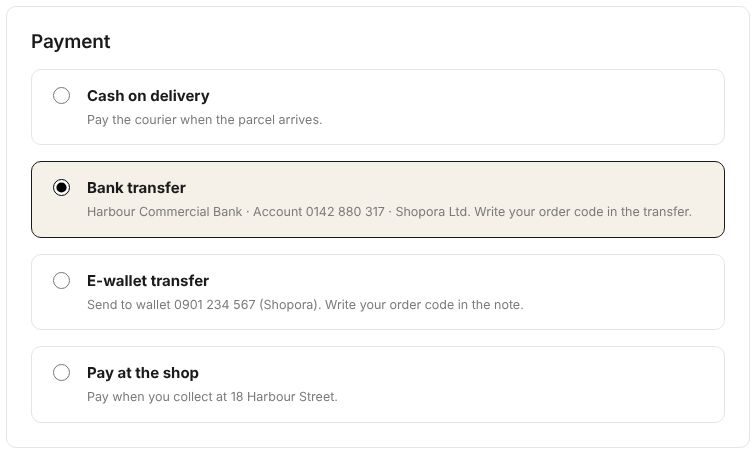
How customers pay: cash on delivery, bank transfer or e-wallet (with a VietQR code), pay in store, or online.
Add a method, give it a name and instructions (account number, what to write in the transfer).
Bank details are shown only to customers who choose the transfer, next to their order.
Online payment uses the platform's gateway (Pay Online). Set the success address /payment-result and cancel address /payment-cancelled.
northwind.shop
The payment choices at checkout.
Delivery fees, free delivery and tax
Where: Settings→Checkout · Tax · Countries / Provinces / Cities
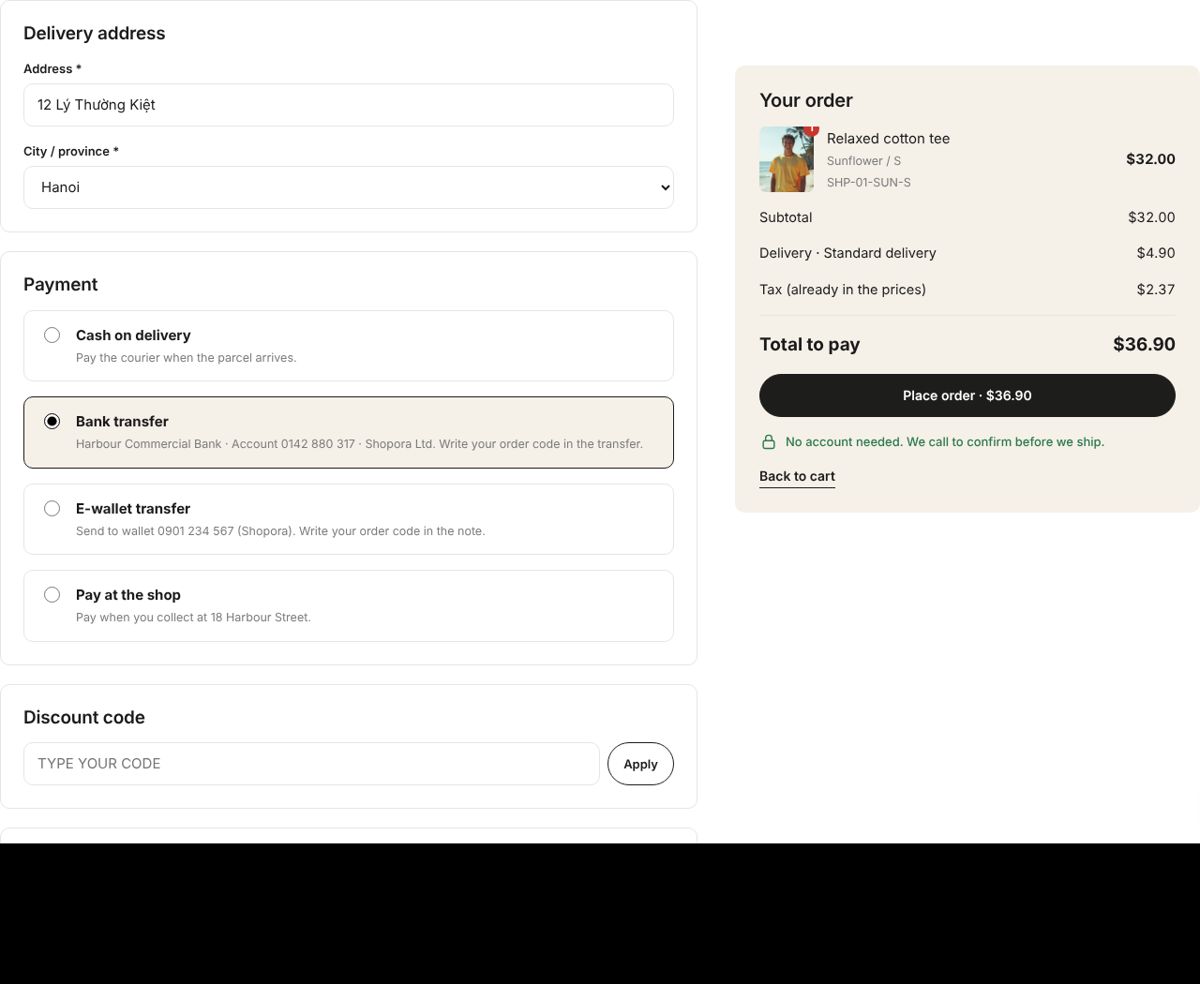
Standard and express fees, collect in store, the free-delivery threshold, tax included or added.
Checkout: standard fee, express fee (0 = none), free from (0 = never), collect in store.
Tax: none / included / added; rate per product.
Provinces / Cities: extra fee per place. Import places pastes a whole list: country, province, city, extra fee.
northwind.shop
Checkout: delivery method, address and fees worked out on the server.
Countries, states and cities
Where: Settings→Countries · States · Cities · Location importer
The places you deliver to fill the address form at checkout. A state can add an extra delivery fee.
Open Settings → Countries, States and Cities to add places one by one or switch a country off; on a state set the Extra delivery fee.
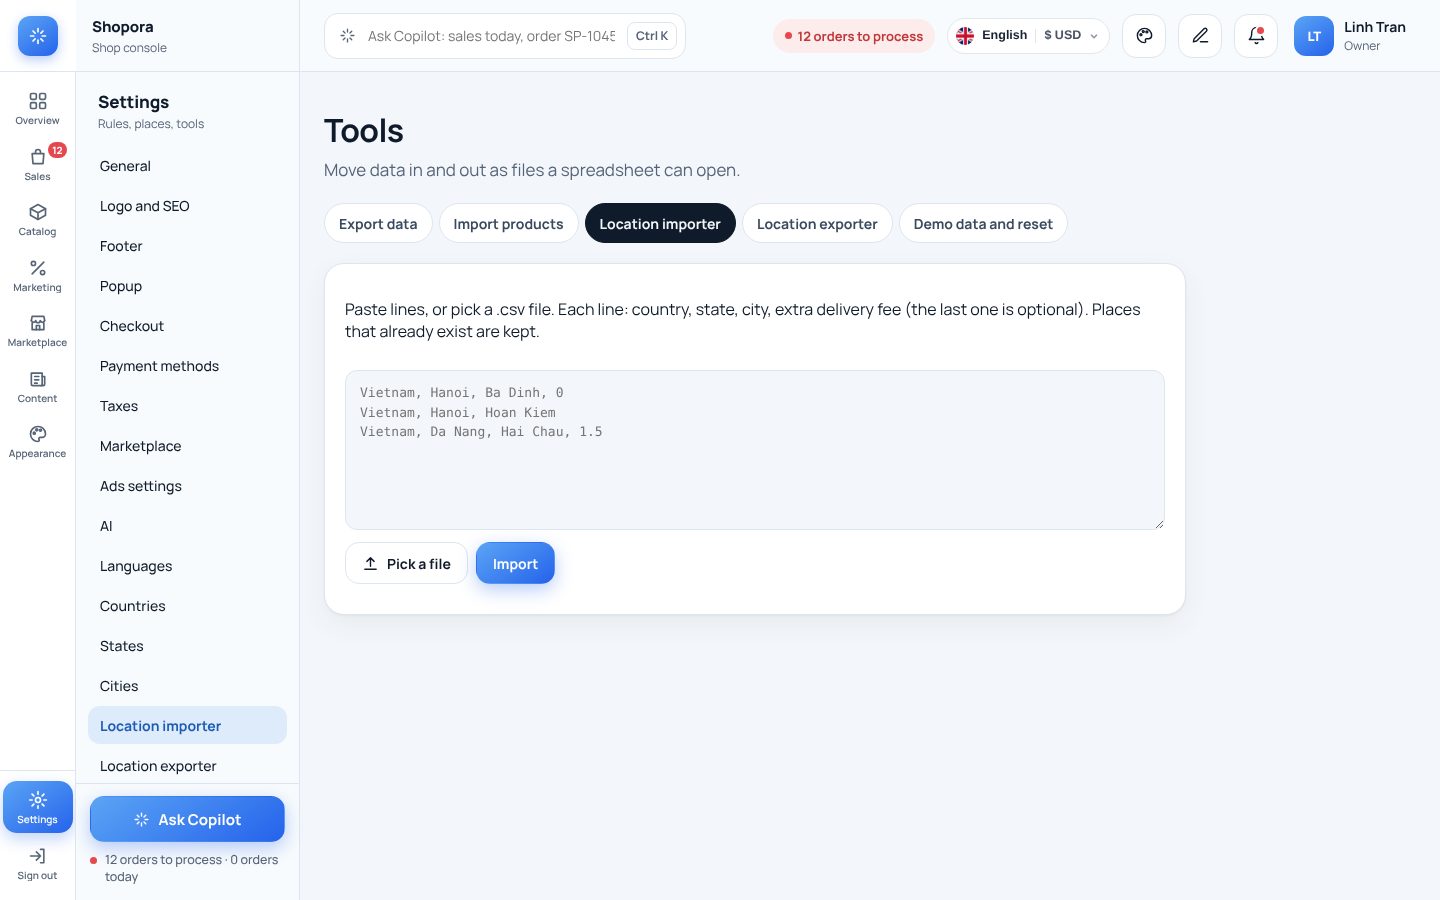
To add many at once open Location importer: paste lines country, state, city, extra fee or pick a .csv file, then Import. Places that already exist are kept.
Location exporter downloads the same file — edit it in a spreadsheet and import it back.
Good to know: The extra fee of a state is added to the standard delivery fee for addresses there.
northwind.shop/tools/locations-import
Paste lines or pick a .csv file.
Promotions
Discount codes
Where: Promotions→Discount codes
Codes customers type in the cart for a percentage or an amount off.
Click Discount codes → Add. Type the code (capitals and digits) and the type: percent or amount.
Set the minimum order, the maximum discount, the number of uses and the dates.
Save. The price is worked out again on the server when the code is used.
Good to know: A code can be shown in the welcome popup so customers copy it with one click.
northwind.shop
The discount code box in the cart.
Flash sale with a countdown
Where: Promotions→Flash sales
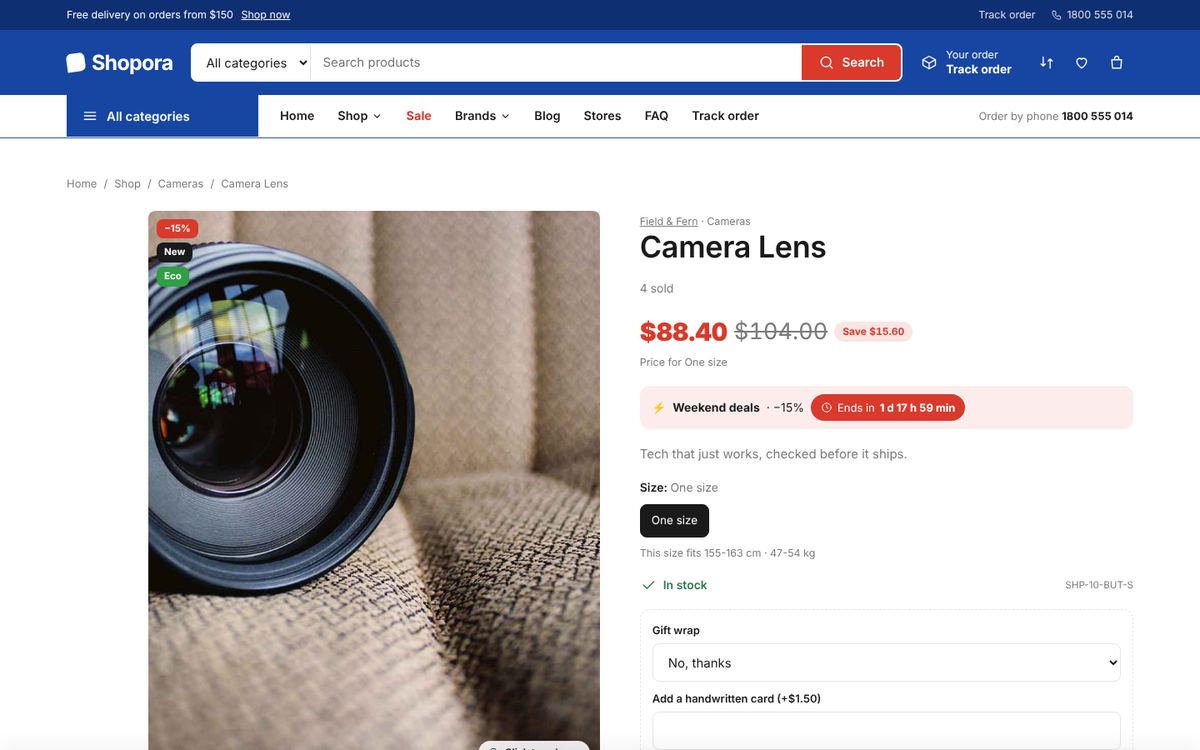
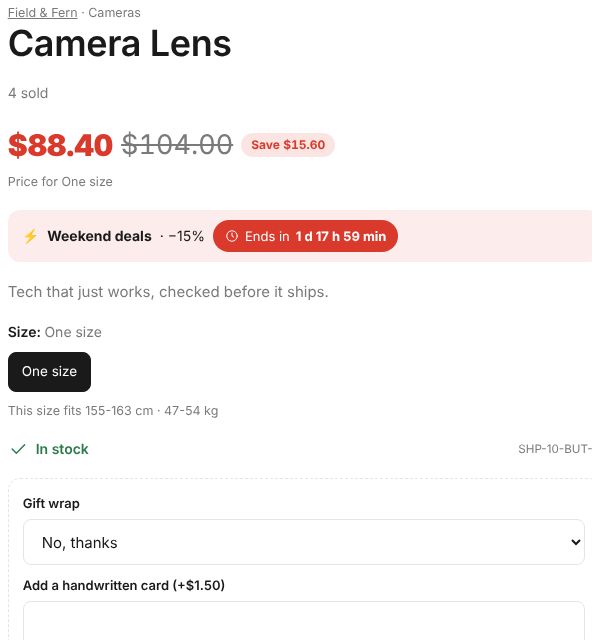
A short sale on a group of products, with a countdown on the home page and the product page.
Create the sale: name, percent off, start and end time.
Pick the products and, if you like, a quantity limit.
Switch on the Flash sale block in Home sections.
northwind.shop
Sale price, −15% badge and the countdown on the product page.