Day board, clients, follow-ups, waiting list, reminders, send queue, ratings, capacity, analytics, settings, languages and currencies. 18 guides — type in the search box to filter.
No guide matches. Try another word, like “booking”, “reminder” or “language”.
Getting started
Install the CRM
Where: Platform admin→Import project
The CRM reads the clinic's clients and appointments, so install Medi Spa Clinic first.
Sign in as super admin and import the files of the zip in name order.
Open /today. The first run reads every appointment and plans the messages.
Good to know: Reminders go out every minute while a CRM page is open; quiet hours keep them for the morning.
Read the day board
Where: Front desk→Today
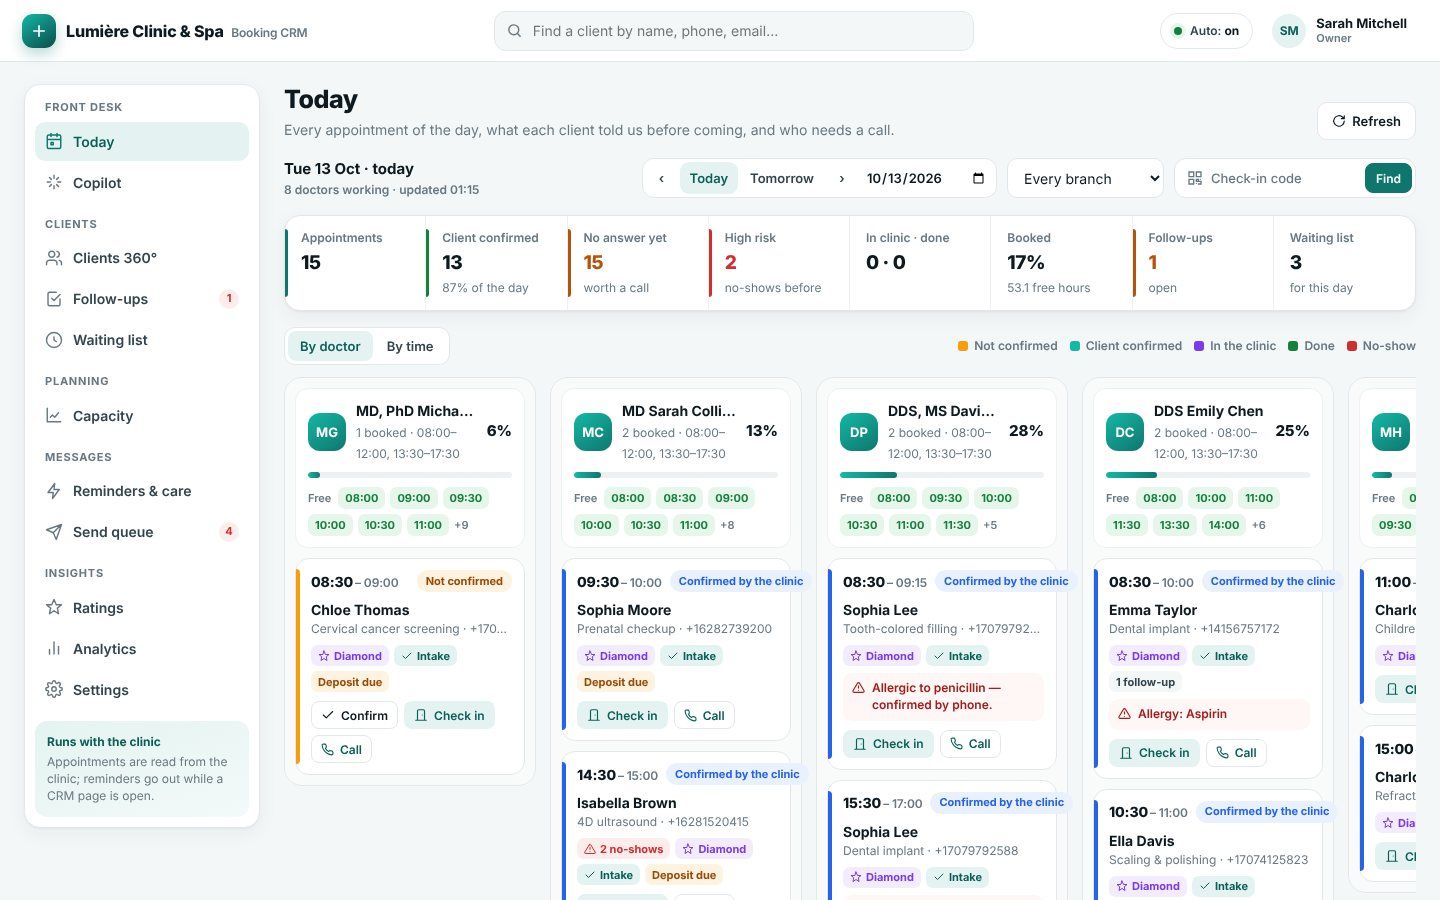
Every appointment of the day by doctor or by time: who confirmed, who has not answered, high risk, in the clinic, booked share and free places.
Pick Today, Tomorrow or a date and a branch.
Cards show the client's answer, tier, allergy and deposit; Confirm, Check in or Call.
Type a check-in code in the box at the top right to find a client.
lumiere.clinic/today
Today by doctor.
Ask Copilot
Where: Front desk→Copilot
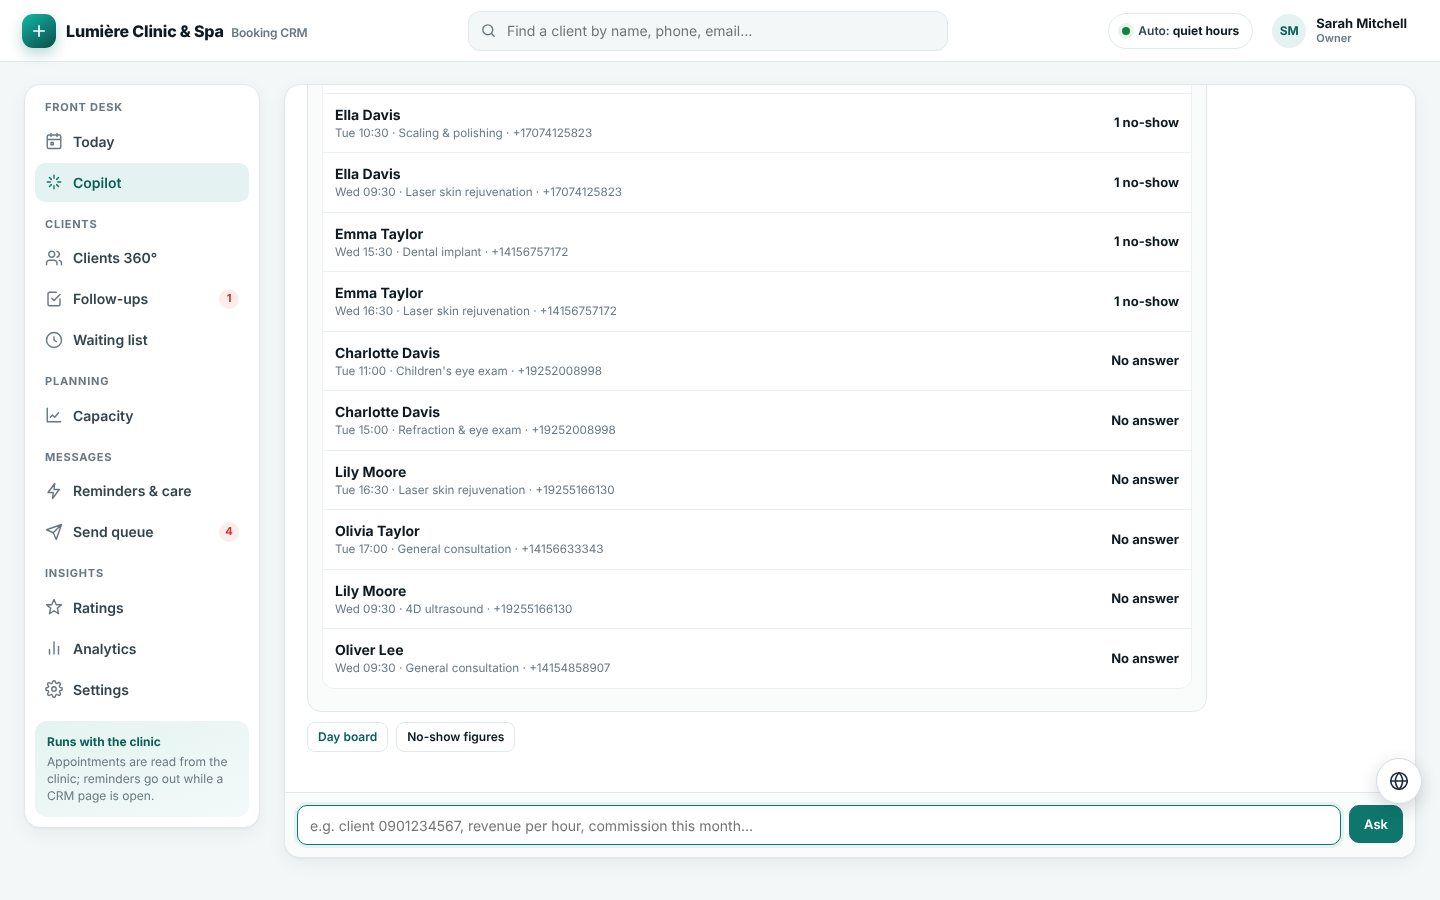
Ask “who might not come tomorrow?”, “ratings last 30 days”, “revenue per hour”, “commission this month”.
Click a suggestion or type a question.
Answers link to the client and to the next step.
lumiere.clinic/copilot
“Who might not come tomorrow?”
Clients
Clients 360°
Where: Clients→Clients 360°
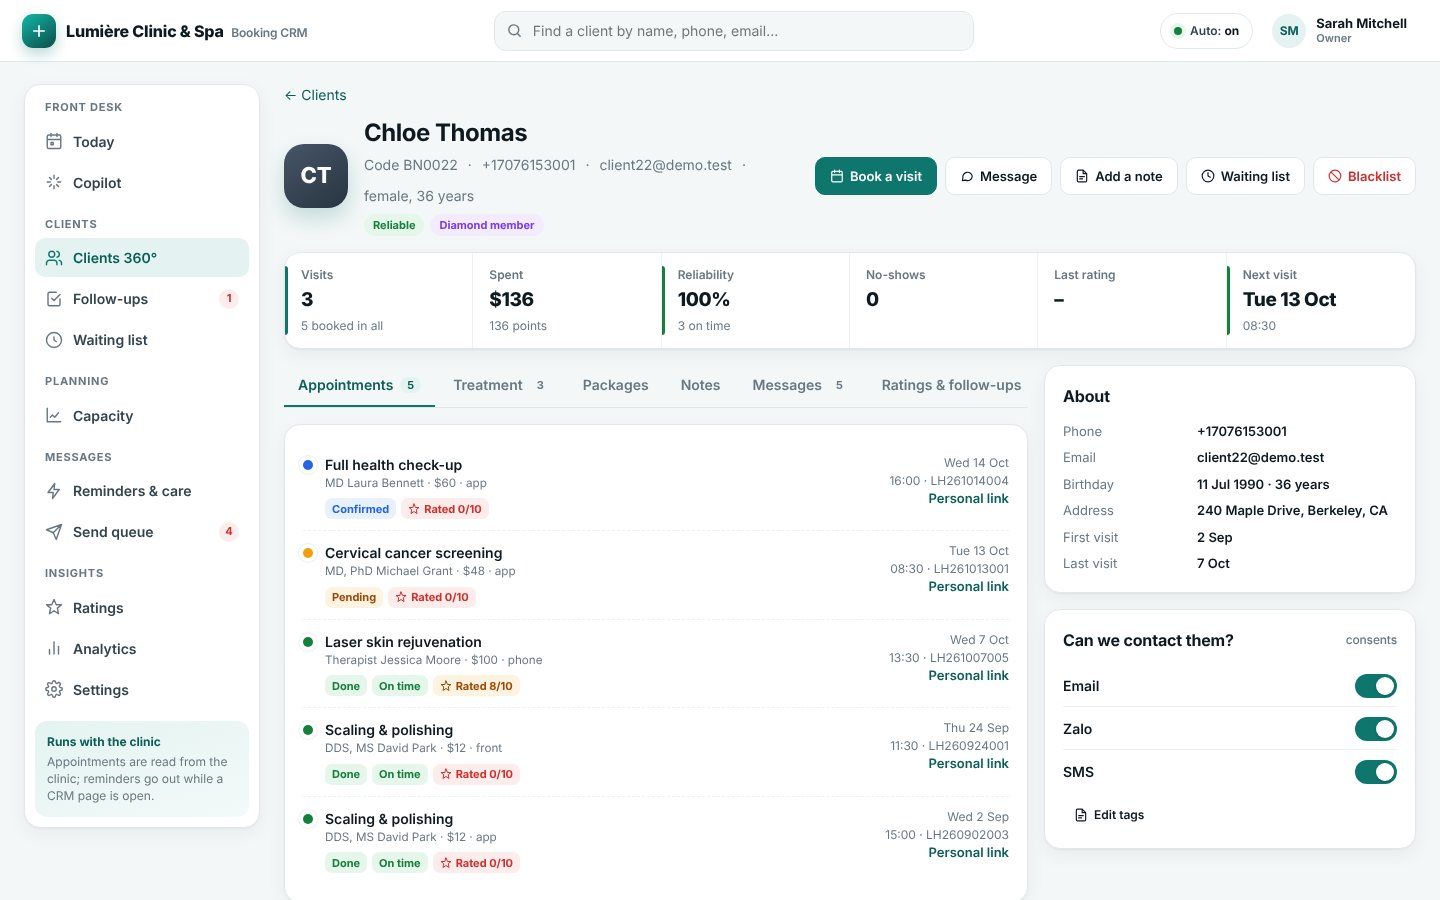
Every client with visits, reliability, no-shows, last and next visit, rating and spending.
Filter by reliability, blacklist, due to come back or last visit.
Open a client: appointments, treatment, packages, notes, messages, ratings.
Buttons: Book a visit, Message, Add a note, Waiting list, Blacklist.
lumiere.clinic/patient/22
A client profile.
Follow-ups
Where: Clients→Follow-ups
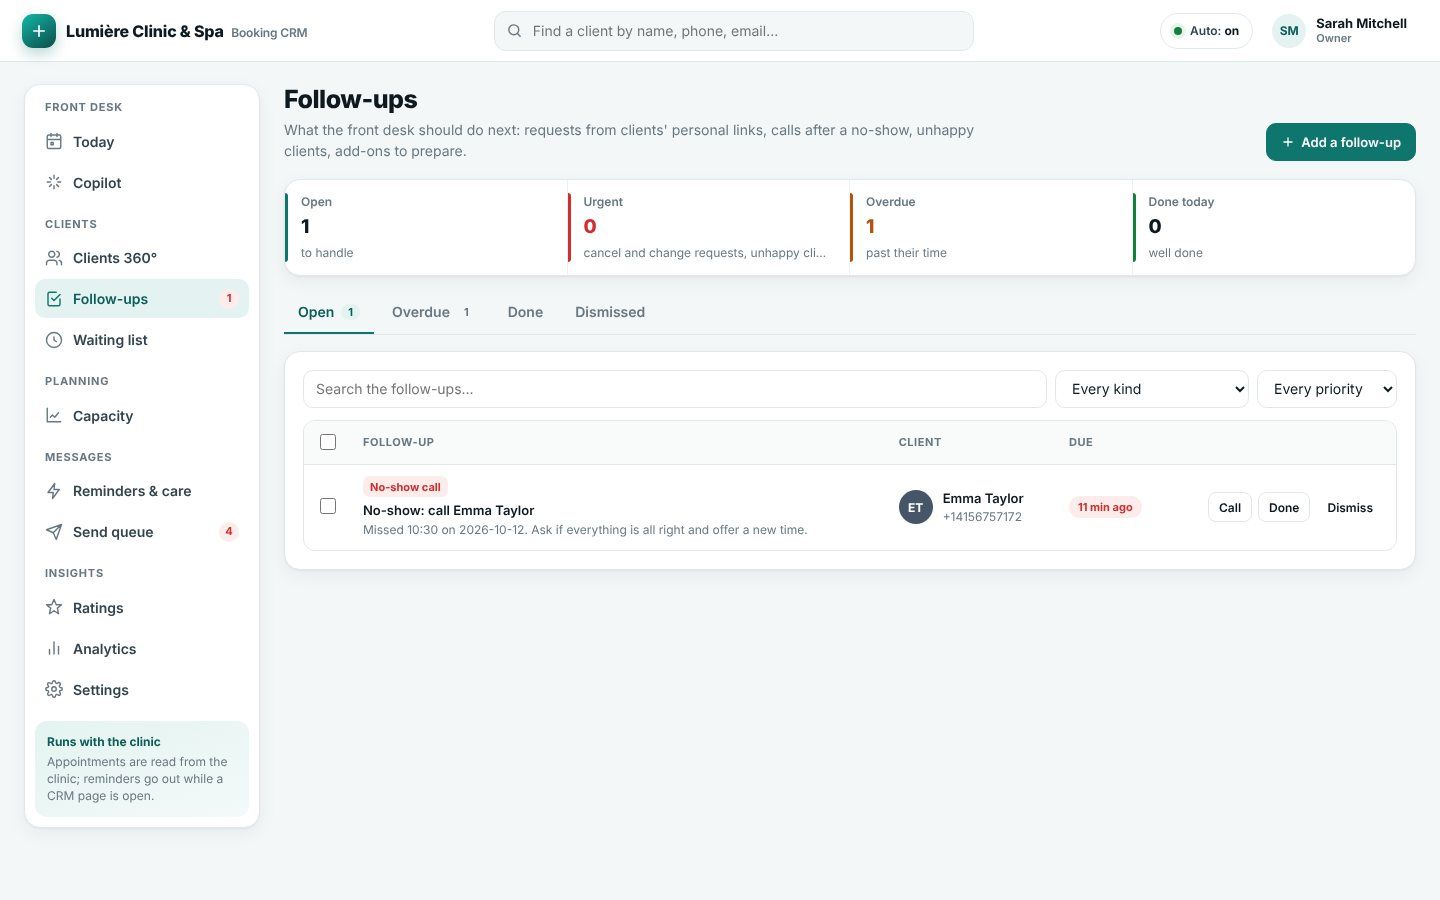
Calls after a no-show, cancel and change requests from personal links, unhappy ratings.
Tab Open: call the client, then Done or Dismiss.
Add a follow-up for anything else.
lumiere.clinic/tasks
Follow-ups.
The waiting list
Where: Clients→Waiting list
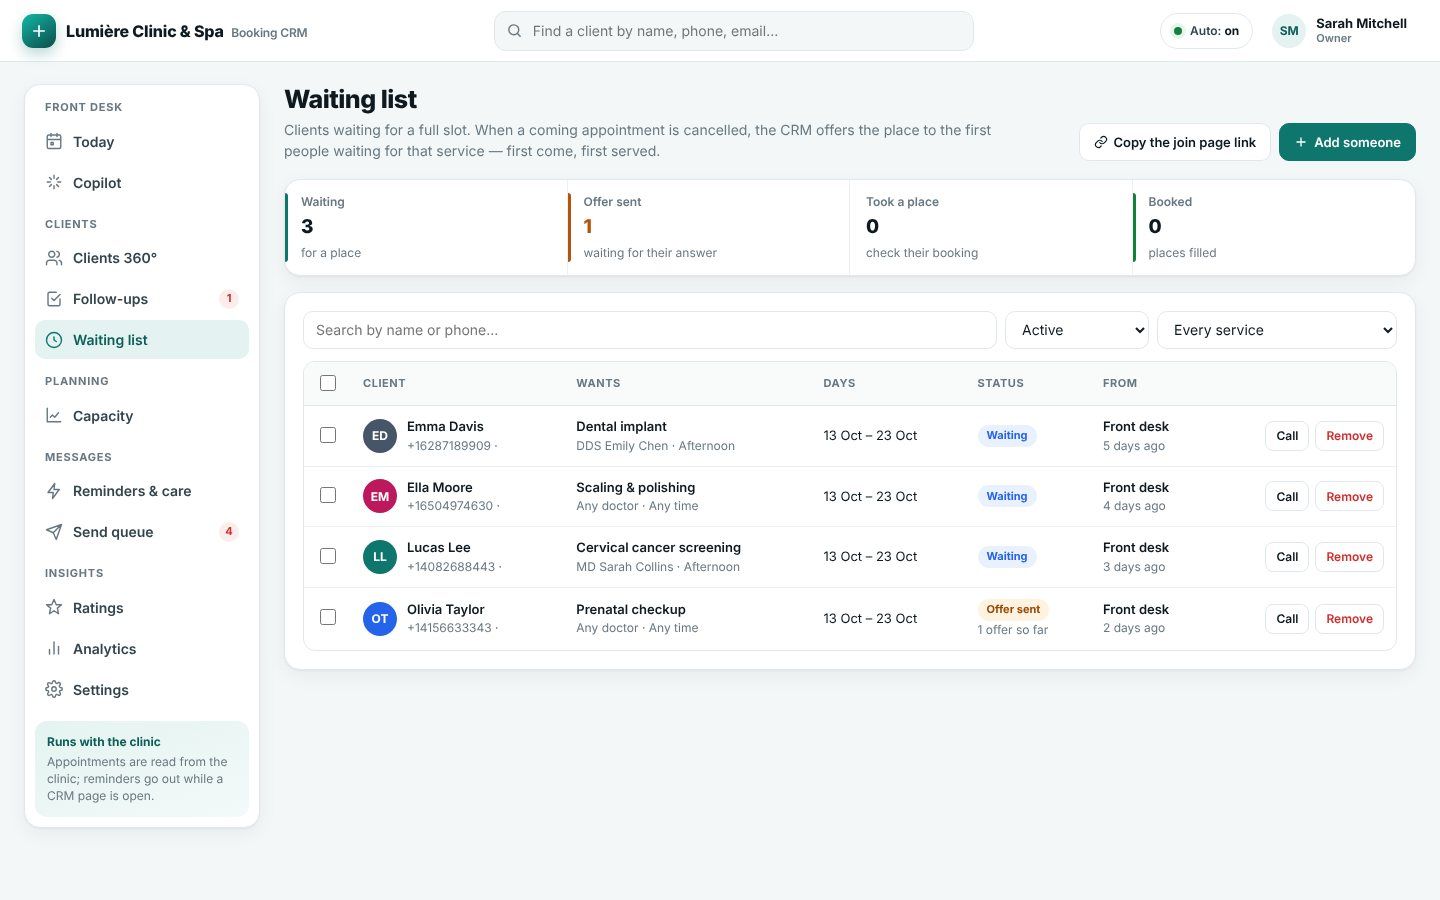
Clients waiting for a full slot. When a place opens the CRM offers it to them first; the offer expires and passes on.
Add someone, or Copy the join page link for clients to add themselves.
Each row shows what they want, the days, the time of day and the status.
lumiere.clinic/waitlist
The waiting list.
Messages
Reminders & care
Where: Messages→Reminders & care
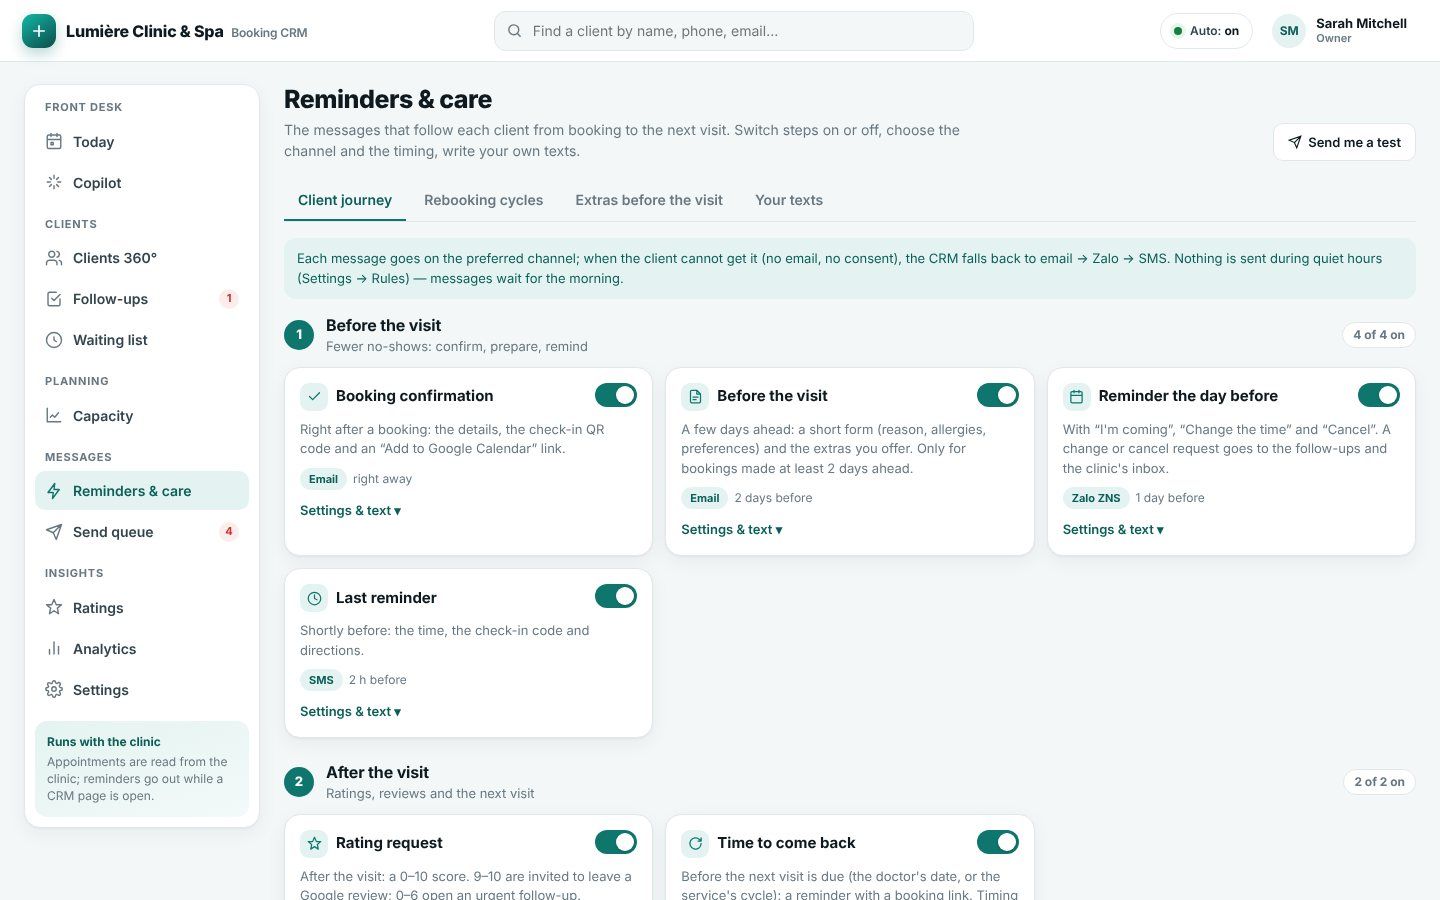
Before the visit: booking confirmation, a pre-visit form, the reminder the day before, the last reminder. After: rating request and time to come back.
Switch each step on or off.
Settings & text: channel and timing.
Tabs Rebooking cycles, Extras before the visit and Your texts.
Send me a test before switching a step on.
Good to know: When a client cannot get the preferred channel the CRM falls back to email → Zalo → SMS.
lumiere.clinic/automations
The client journey.
The send queue
Where: Messages→Send queue
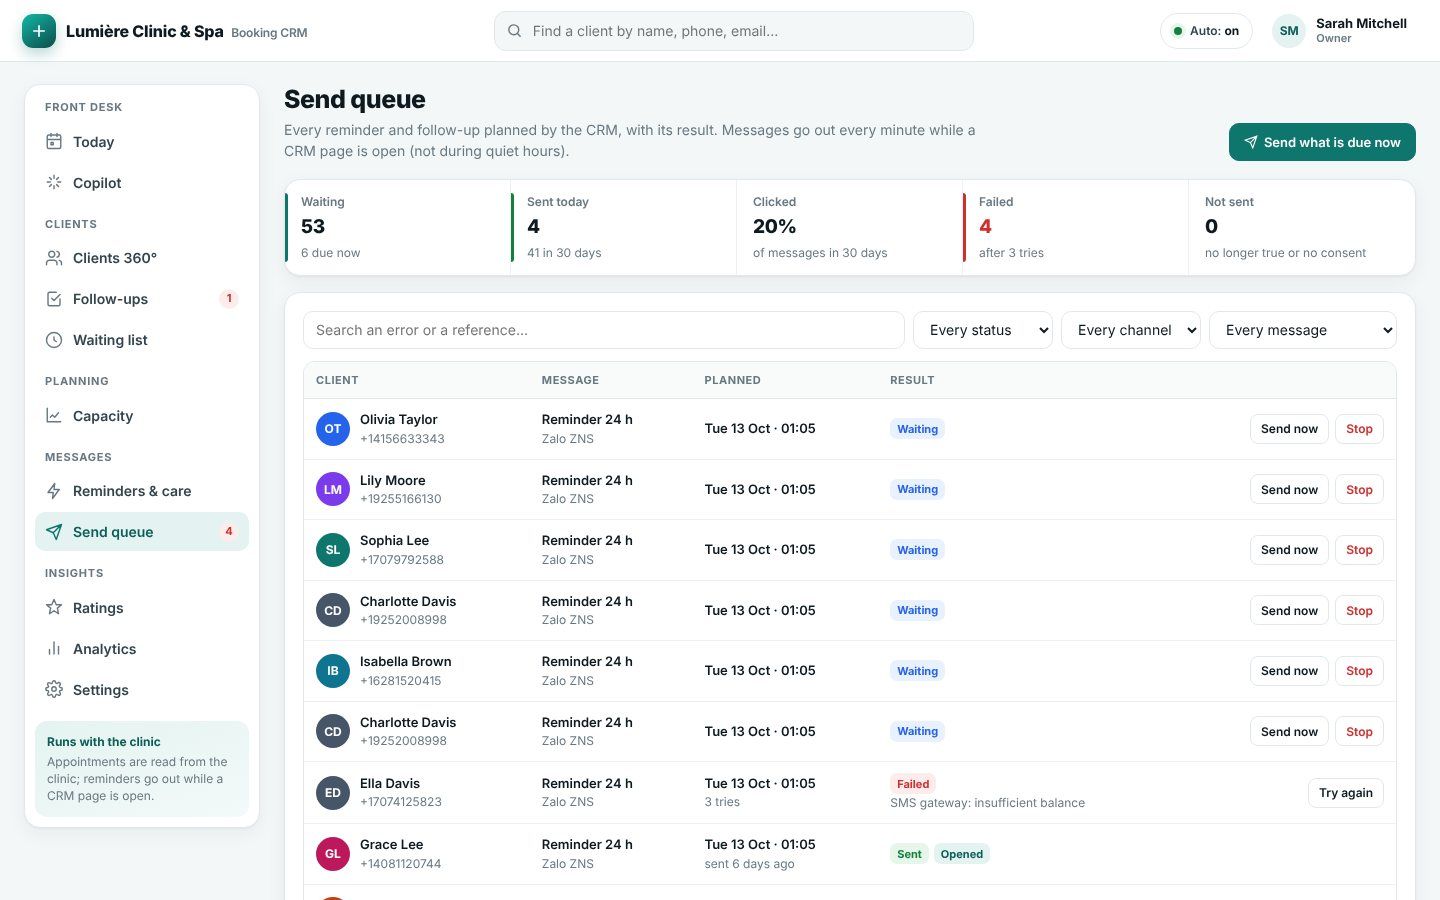
Every message waiting or sent, with opens, clicks and failures.
Filter by status, channel and message.
Send now or Stop one message; Try again after fixing a channel.
Send what is due now does the next minute's work at once.
lumiere.clinic/queue
The send queue.
What clients see
Where: Personal link→/visit · /rate · /join
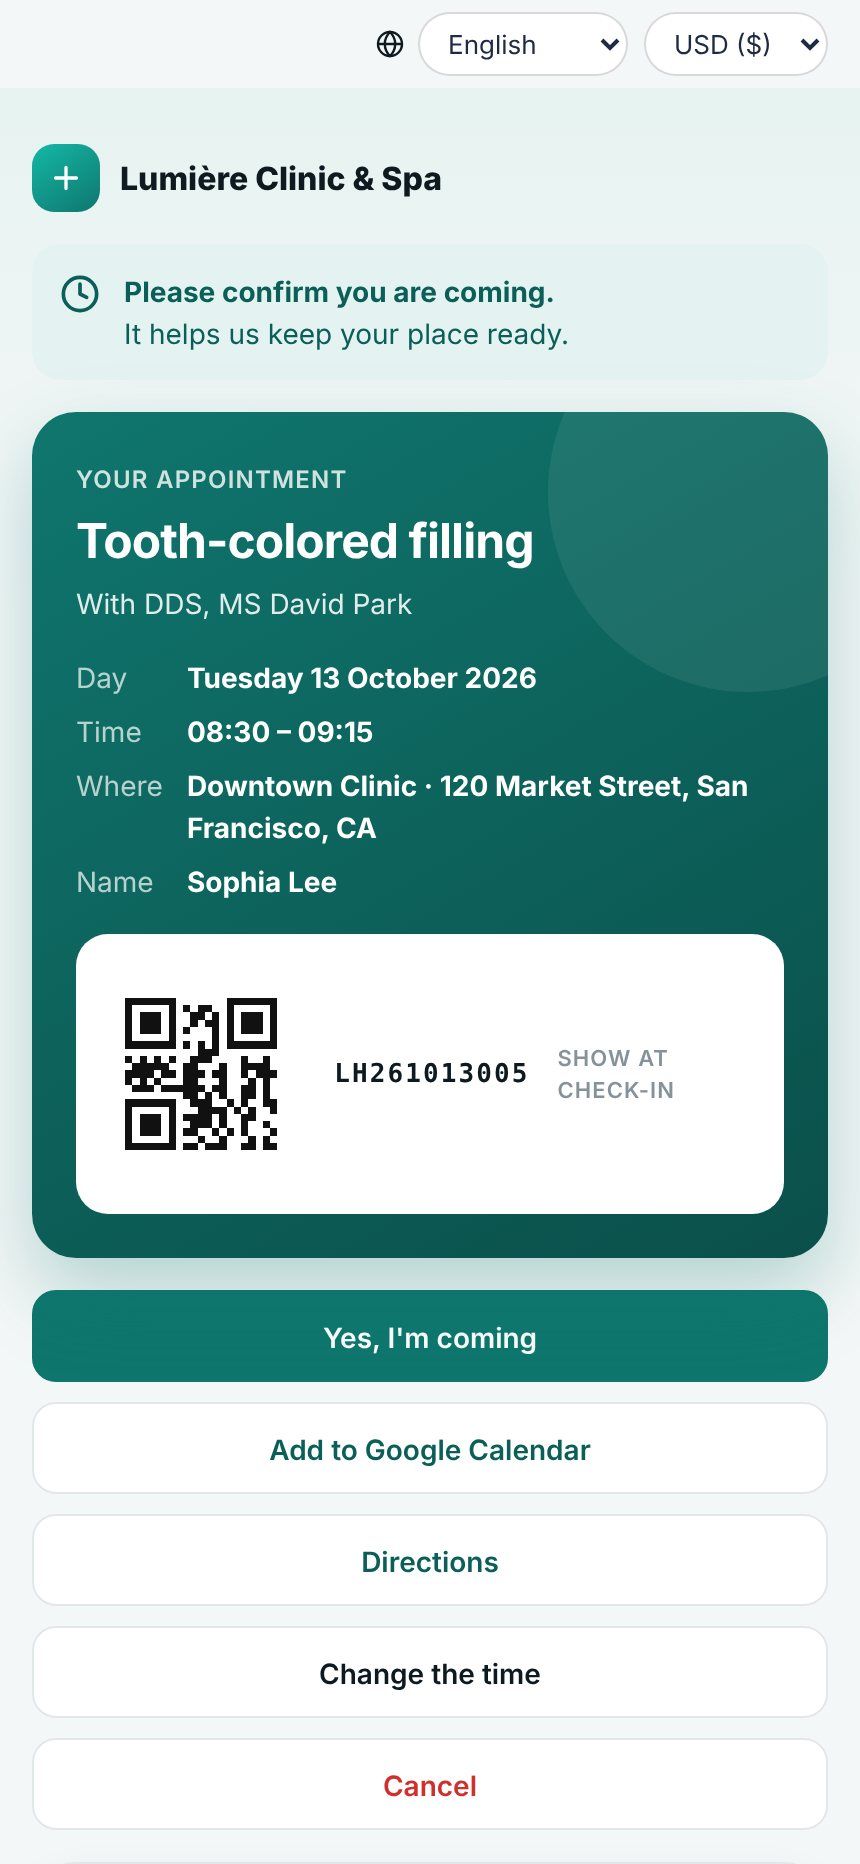
Each message carries a link: confirm, add to calendar, directions, change the time, cancel, fill the intake form, rate.
The client taps Yes, I'm coming — the board shows it.
Change the time shows the same doctor's free slots.
After the visit the rating page asks for a score 0–10.
The client's personal page.
Insights
Ratings
Where: Insights→Ratings
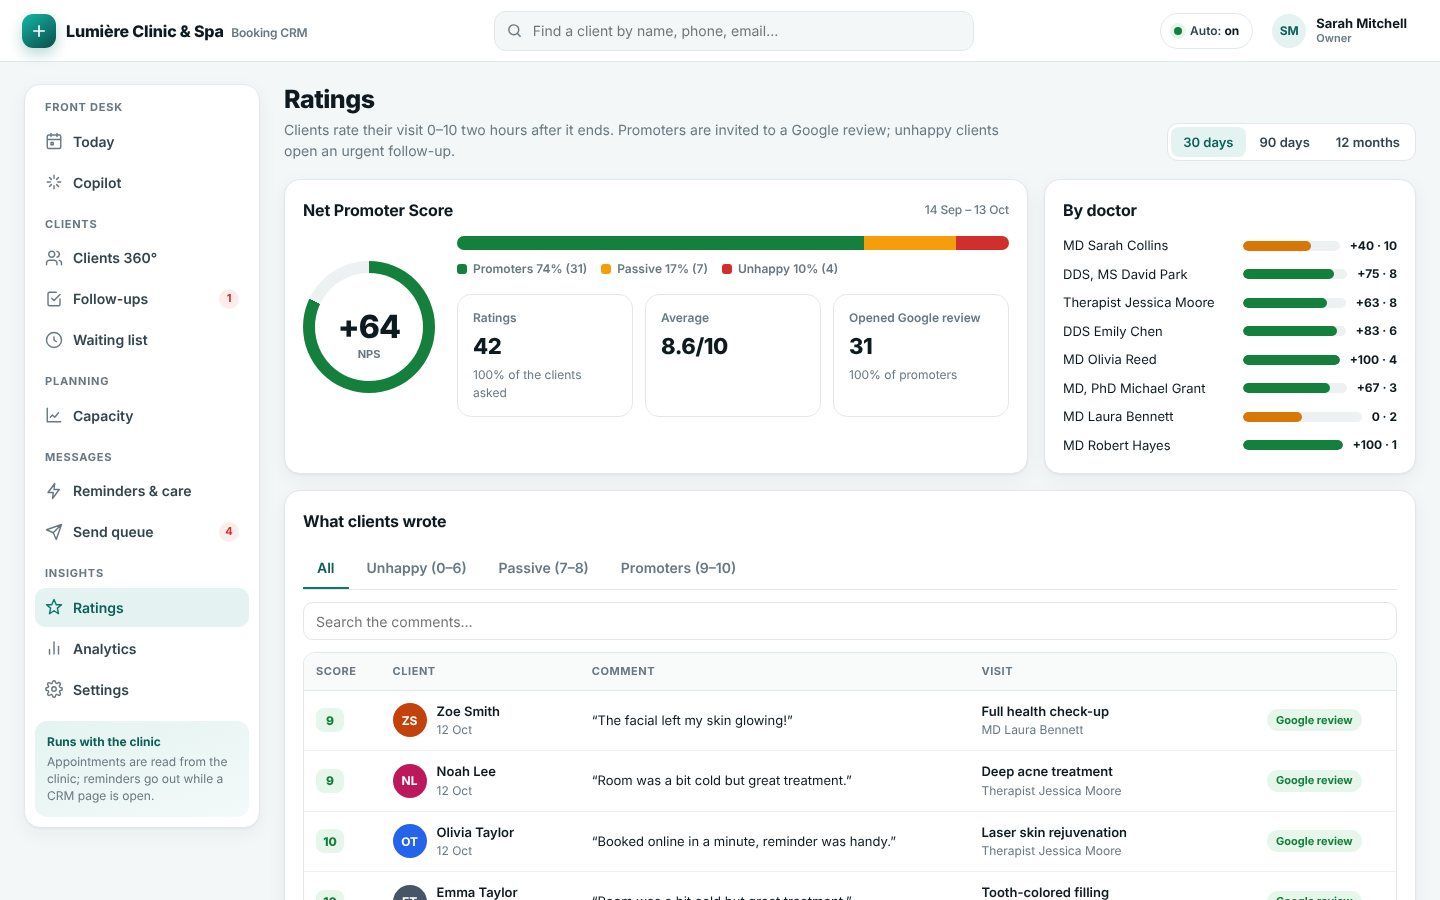
Net Promoter Score, ratings by doctor and every comment. Promoters are invited to a Google review; 0–6 opens a follow-up.
Pick 30 days, 90 days or 12 months.
Filter comments: unhappy, passive, promoters.
lumiere.clinic/feedback
Ratings.
Capacity
Where: Planning→Capacity
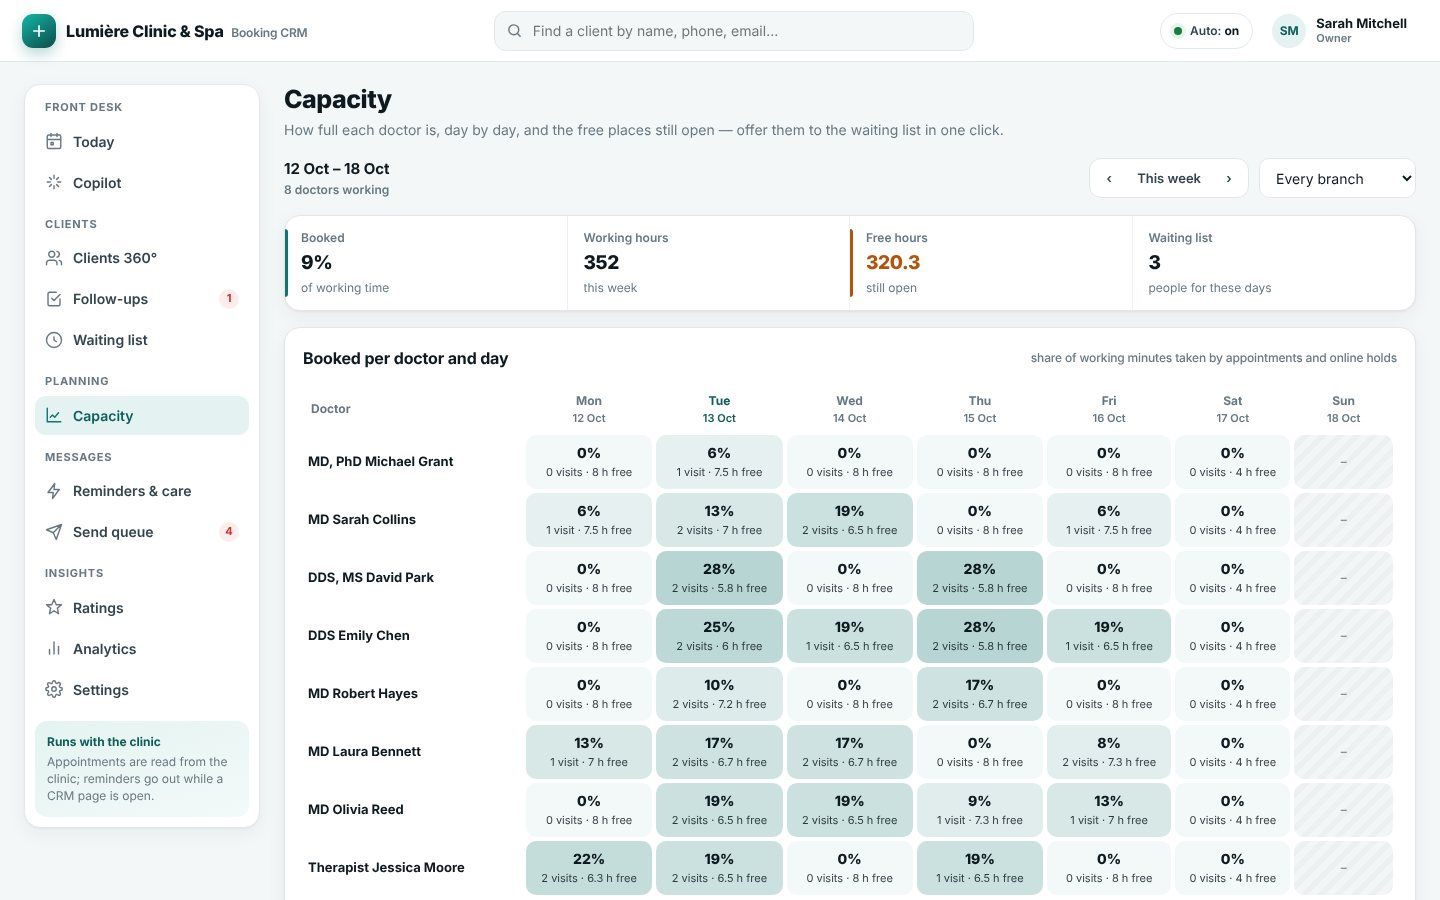
The booked share of each doctor's working hours, day by day, and the free places still open.
Move week by week; pick a branch.
Offer free places to the waiting list.
lumiere.clinic/capacity
Capacity per doctor and day.
Analytics
Where: Insights→Analytics
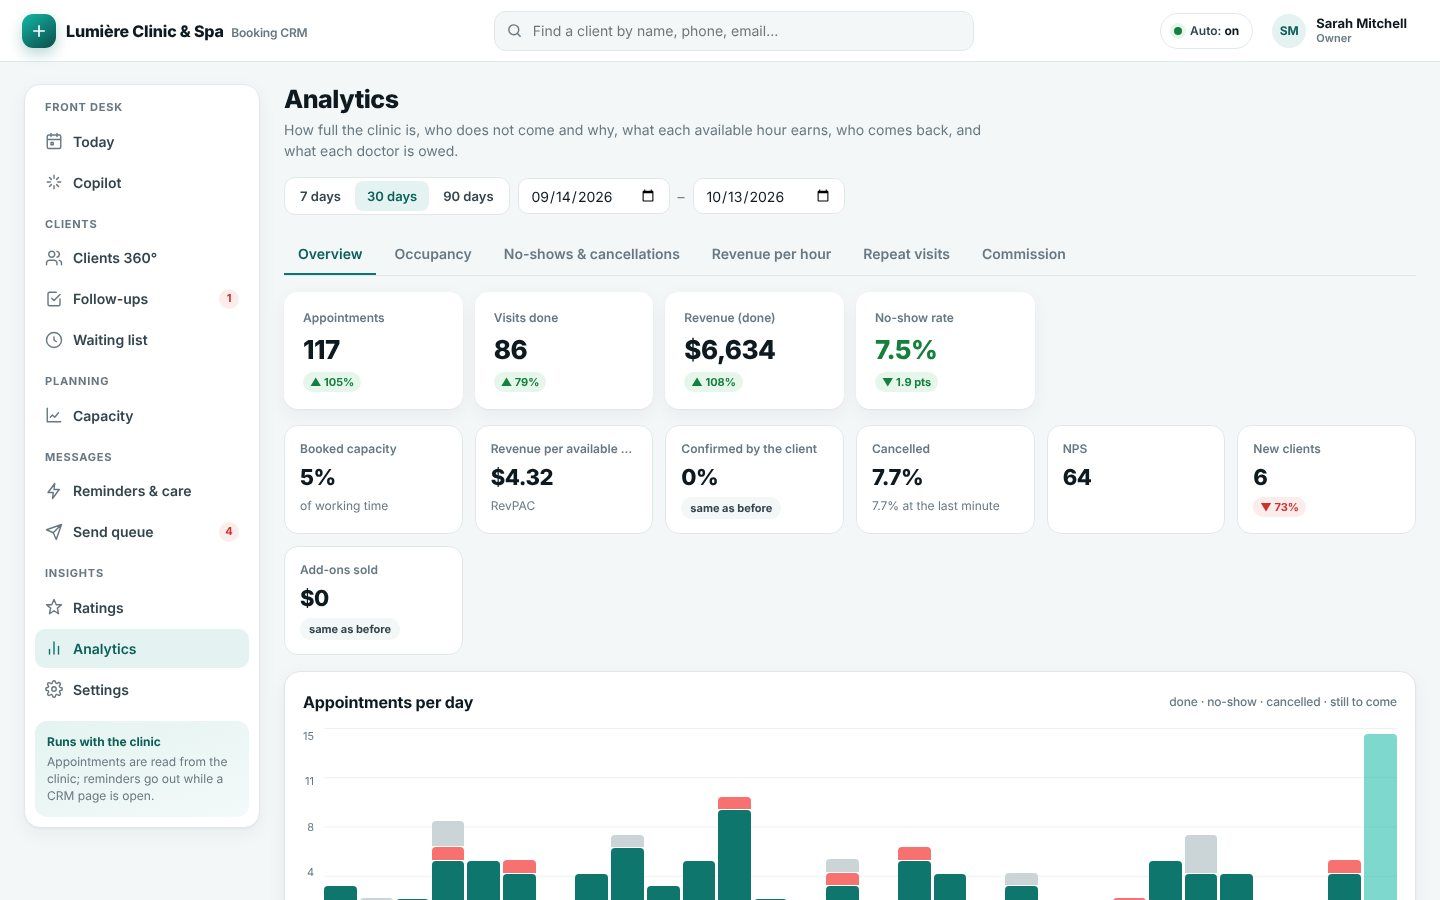
Occupancy, no-shows and cancellations, revenue per available hour, repeat visits and commission.
Pick 7, 30 or 90 days or your own dates.
Switch tabs for each report.
lumiere.clinic/analytics
Analytics overview.
Settings and channels
Where: Insights→Settings
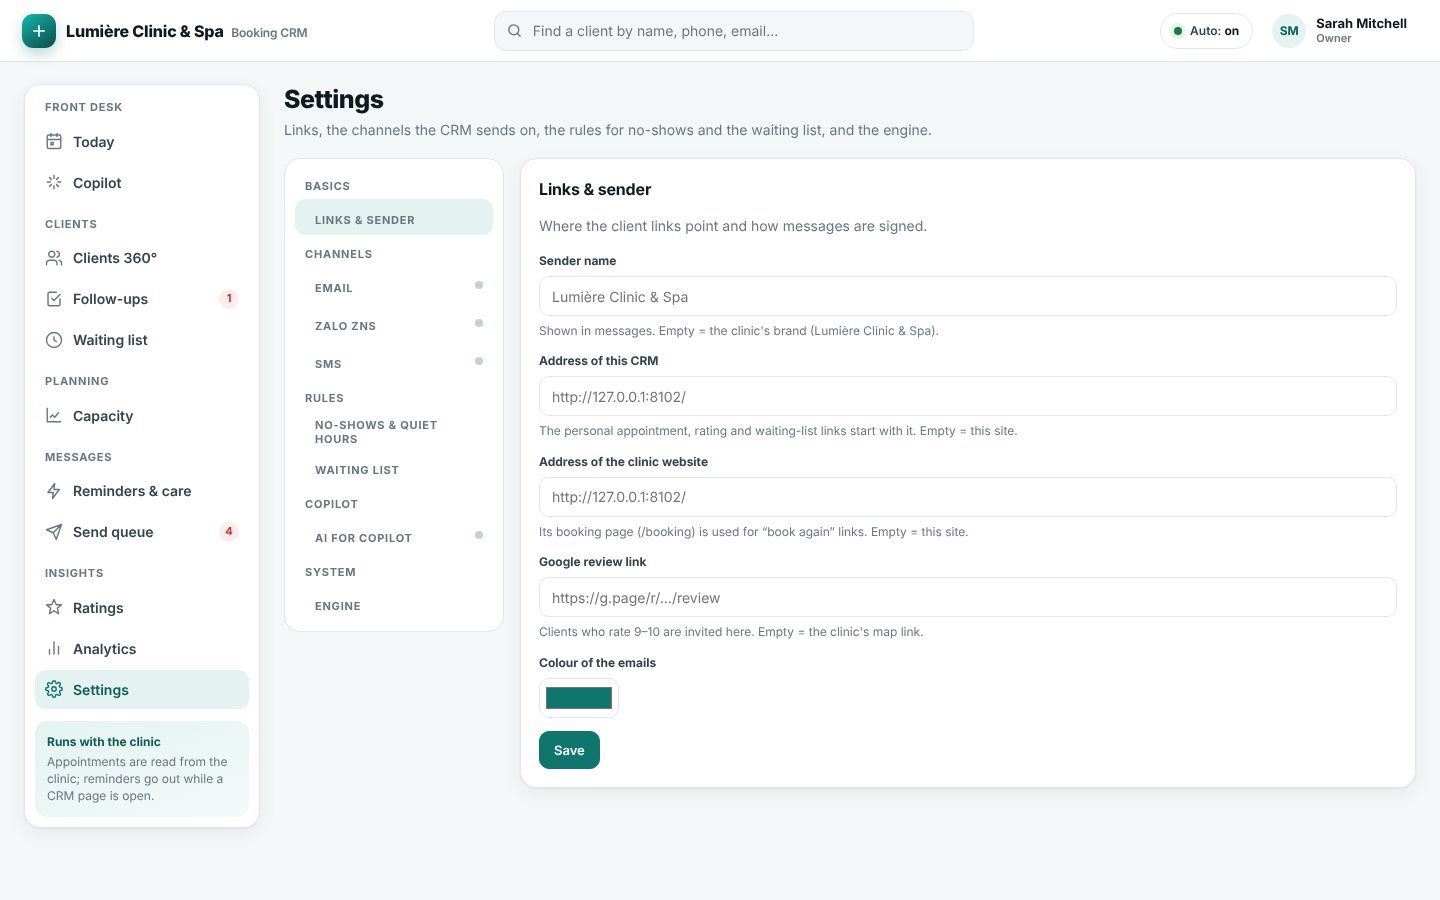
Links and sender, email, Zalo ZNS and SMS, no-show and quiet-hours rules, waiting list, AI for Copilot.
Links & sender: sender name, the CRM and website addresses, Google review link.
Email, Zalo ZNS, SMS: provider and key — keys stay on the server.
No-shows & quiet hours, Waiting list, AI for Copilot.
lumiere.clinic/settings
Settings.
Languages & currency
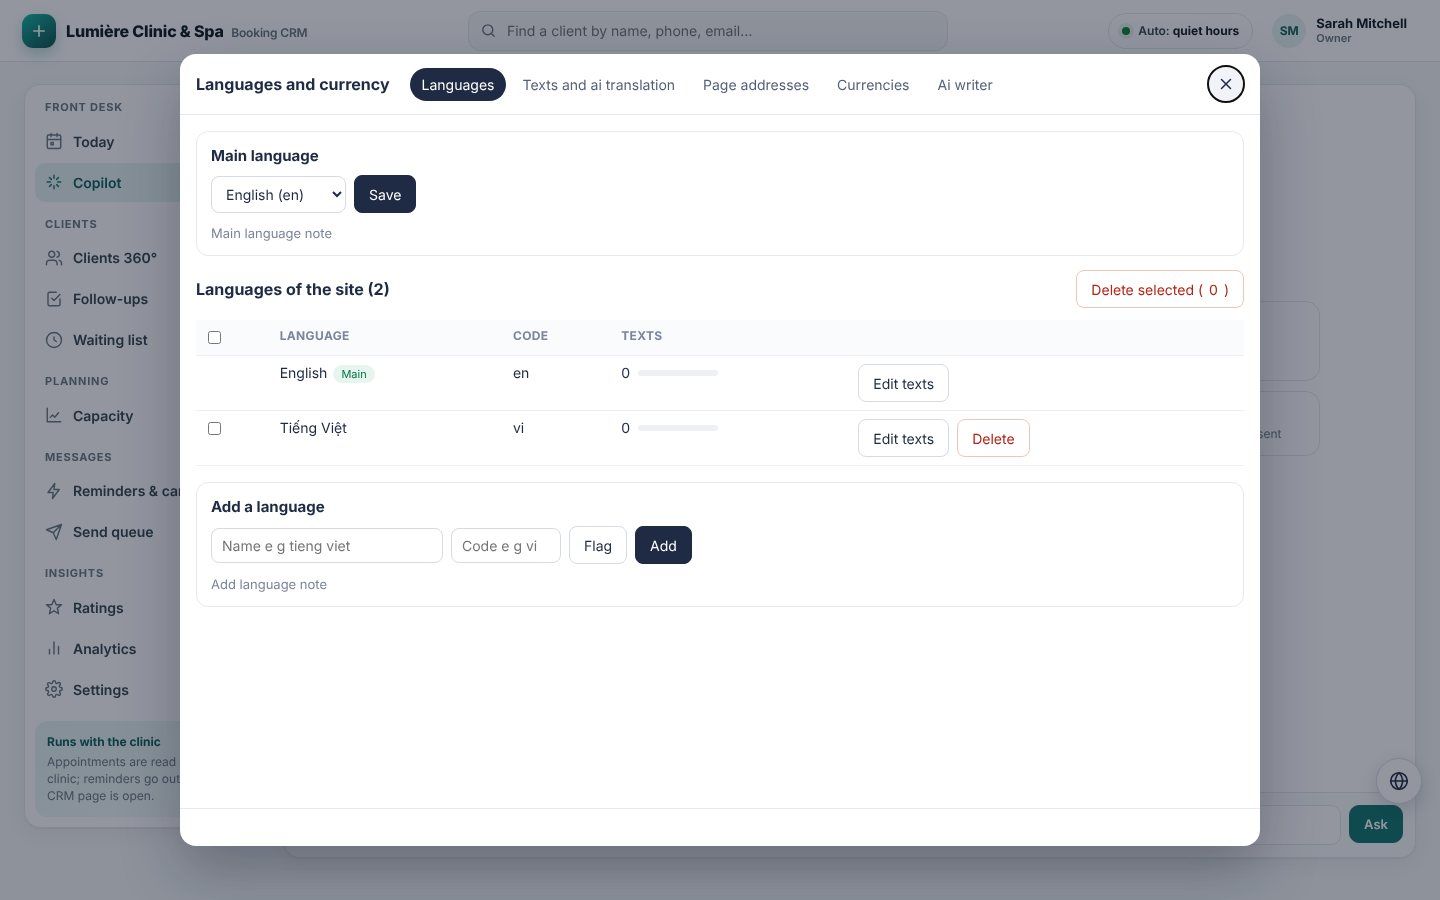
Add a language and translate it with AI
Where: Copilot→🌐 button→Languages
The screens and the website can speak any language. The texts of every language live in the platform; AI translates what is missing and you check it before saving.
Sign in as the platform's super admin (only he can save languages) and open Copilot. Click the round 🌐 button, or ask Copilot “languages”.
Tab Languages → Add a language: name (Tiếng Việt), code (vi) and a flag. It starts with every English text.
Tab Texts & AI translation: pick the language, then Translate missing with AI. AI fills only empty boxes, in small batches; Stop pauses it.
Read the texts marked AI, correct what you like, then Save all texts.
Good to know: AI runs in three ways: your own key (Settings → AI, called from the server), else the platform's AI, else you type the texts yourself.
Good to know: Placeholders such as :n and {name} are kept exactly as they are.
lumiere.clinic/copilot#languages
The Languages & currency panel on the CRM Copilot page.
Choose the main language
Where: 🌐 Languages→Main language
Visitors who have not picked a language see the main one — Vietnamese for a clinic in Vietnam, for example. It applies to every product on the website.
Open the 🌐 panel, tab Languages.
Under Main language pick the language and click Save.
Visitors switch any time with the language menu in the header; their choice is kept for a year.
Good to know: Your own texts typed on the website screens are shown in the main language; other languages show their translation.
Page addresses per language
Where: 🌐 Languages→Page addresses
Each page can have its own address in each language — /booking in English, /dat-lich in Vietnamese.
Tab Page addresses, pick the language.
Suggest addresses with AI fills the empty ones; edit any of them.
Only small letters a–z, digits and dashes; two pages may not share an address. Save addresses.
Show prices in several currencies
Where: 🌐 Languages→Currencies
Visitors see prices in the currency they choose. Every amount is stored in the base currency (rate 1); staff screens always show the base.
Tab Currencies → Add a currency: code (EUR), sign (€) and the rate for 1 unit of the base.
Choose the side of the sign and the space, check the example, save.
The currency menu appears on the client pages as soon as there are two currencies.
Good to know: Changing a rate never changes a stored amount.
Write and improve content with AI
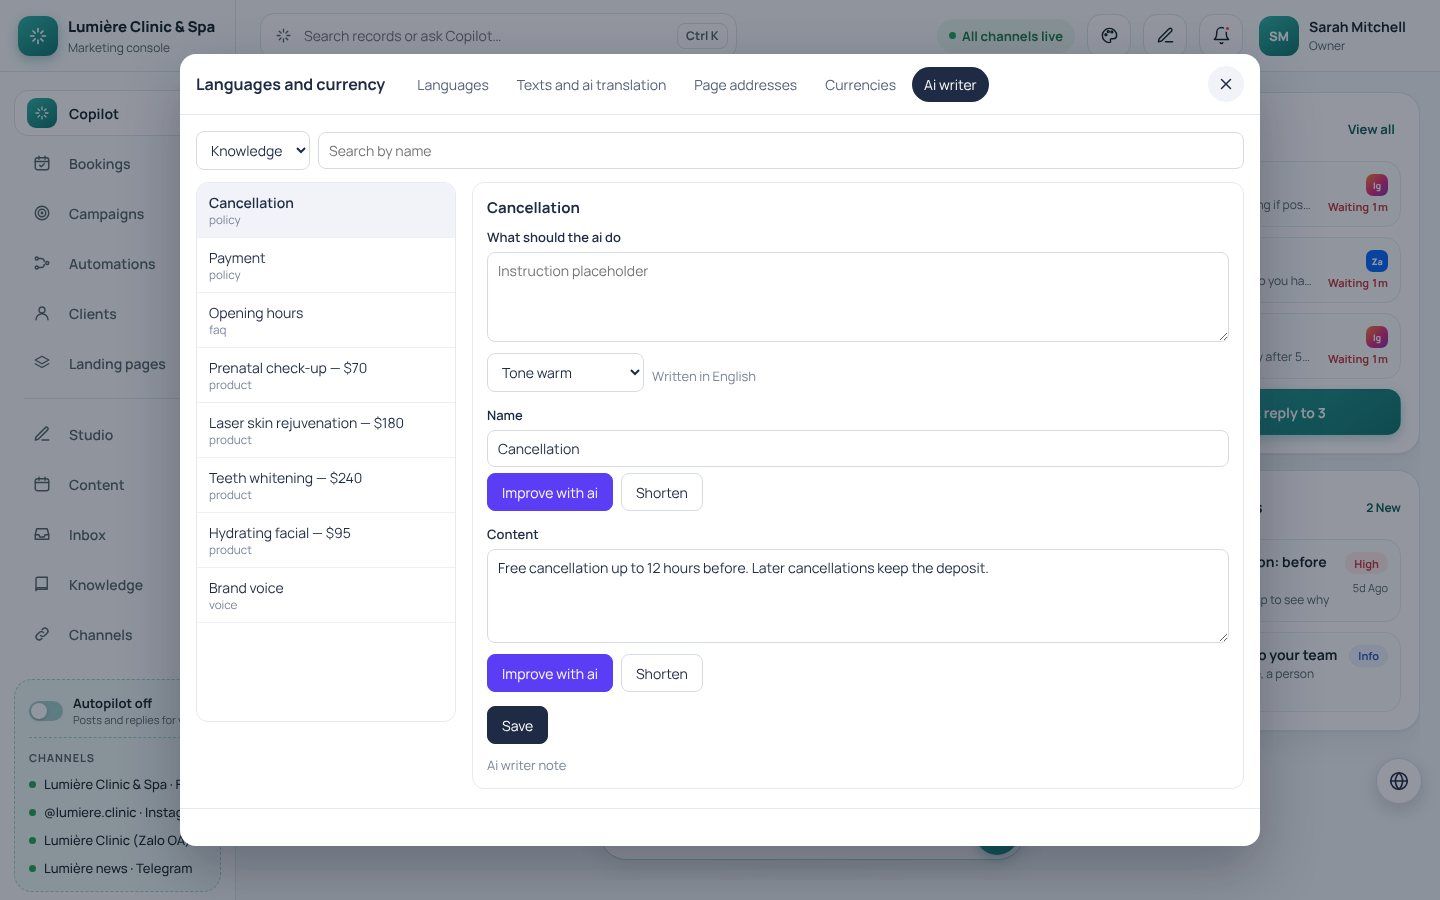
Where: 🌐 Languages→AI writer
Rewrite your automatic messages and the extras offered before a visit in the main language: write from scratch, improve or shorten, with a tone and an instruction.
Tab AI writer, pick the list and the item.
Optionally type what the AI should do and choose a tone.
Write with AI, Improve with AI or Shorten on a field, read the result, then Save.
Good to know: The AI only uses facts already written there or in your instruction — never invented prices or medical claims.